Patio pavers are a top pick for homeowners aiming to beautify their outdoor spaces on a budget. They provide a sturdy and easy-to-care-for flooring option. This makes them perfect for those seeking to craft a stunning yet practical area for entertaining and unwinding outdoors.
Opting for patio pavers brings numerous advantages, including enhanced durability and simplicity in upkeep. Even with a DIY budget, you can still achieve top-notch results. This makes patio pavers a great choice for those looking to save money without compromising on style or functionality. Whether you’re setting up a new outdoor area or refreshing an existing one, patio pavers are a smart pick.
Key Takeaways
- Patios pavers are a cost-effective option for outdoor flooring on a DIY budget
- They offer a durable and low-maintenance solution for outdoor living spaces
- Patio pavers come in a variety of styles and materials to suit different tastes and needs
- With proper installation, patio pavers can last for many years with minimal upkeep
- They can be used to create a wide range of outdoor living spaces, from patios to walkways and driveways
- Patio pavers are an excellent choice for homeowners who want to enhance their outdoor living space without breaking the bank
Understanding Patio Pavers and Their Benefits
In patio design, paver installation is key. There are many types of patio pavers, each with its own benefits and costs. From concrete to brick and stone, each offers unique advantages. Ground preparation is crucial for a stable and even patio base.
A well-designed patio boosts your property’s value and creates a beautiful space for relaxation and entertainment. Choosing the right paver and considering durability, maintenance, and cost is essential. Whether you DIY or hire a pro, understanding paver installation benefits and process is crucial for professional results.
Types of Patio Pavers Available
- Concrete pavers: durable and low-maintenance
- Brick pavers: classic and elegant
- Stone pavers: natural and slip-resistant
Cost Comparison: DIY vs Professional Installation
DIY paver installation can save money, but professional work ensures quality and longevity. It’s important to consider time, labor, and materials when deciding.
Durability and Longevity Features
Patio pavers are built to last, handling weather and foot traffic well. The right paver and proper installation and care lead to a durable patio for years.
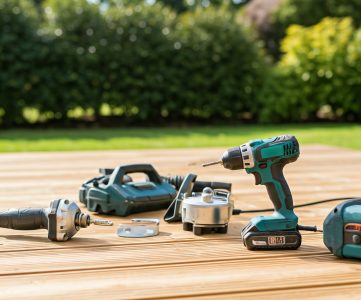
Essential Tools and Materials for Your Paver Project
For your outdoor flooring project, the right tools and materials are key. You’ll need items like trowels, levelers, and sand. The paver patterns you pick will also influence your patio’s look and drainage.
Here are the essential tools and materials for a successful installation:
- Trowels for spreading sand and mortar
- Levelers to ensure even surfaces
- Sand for filling gaps between pavers
- Paver seals to protect your outdoor flooring from the elements
- Edge restraints to keep your pavers in place
Choosing the right paver patterns is crucial for your patio’s look and functionality. Consider drainage, durability, and maintenance when picking patterns. With the right tools and materials, you can create a lasting and beautiful outdoor space.
Popular paver patterns include herringbone, brick, and circular. Each pattern offers unique benefits and drawbacks, allowing for various styles. By selecting the right patterns, you can achieve a functional and visually appealing patio.
Design and layout are also key for your patio. Consider its size, shape, and the furniture and decorations you’ll use. A well-planned patio will meet your needs and exceed your expectations.
| Tool/Material | Description |
|---|---|
| Trowel | Used for spreading sand and mortar |
| Leveler | Used to ensure even surfaces |
| Sand | Used for filling gaps between pavers |
| Paver Seal | Used to protect your outdoor flooring from the elements |
Planning Your Patio Layout
Creating a beautiful and functional outdoor space requires careful planning. A well-designed patio can enhance your yard’s landscaping, while a poorly planned one can detract from it. Begin by considering the overall patio design and how it will integrate with your yard’s existing landscape.
Measuring your space is a crucial step in the planning process. Note the dimensions of your yard, including any obstacles like trees, gardens, or slopes. This will help you determine the best layout for your patio. It ensures the patio fits seamlessly into the surrounding landscaping. You’ll also need to consider the ground preparation required for a stable and level surface.
Measuring Your Space
- Take note of the dimensions of your yard, including any obstacles
- Determine the best layout for your patio
- Consider the ground preparation needed for a stable surface
With a good understanding of your space, you can start creating a design blueprint. This blueprint will help you visualize your patio and make any necessary adjustments before starting construction. Remember to focus on the overall patio design and how it will complement your yard’s existing landscaping.
Ground Preparation Techniques
Proper ground preparation is key when laying pavers for outdoor flooring. It ensures the pavers’ stability and longevity. First, assess the soil condition to choose the right excavation method. This involves checking the soil type, density, and moisture levels for potential issues.
Next, focus on implementing effective drainage solutions. This can be done by installing a drainage system or using permeable paver materials. Good drainage prevents water accumulation, which can cause uneven settling and damage. A well-designed drainage system keeps the outdoor flooring safe and functional.
Soil Assessment and Excavation
Conducting a thorough soil assessment is crucial for excavation. Test the soil to understand its composition and density. Based on these results, tailor the excavation process to meet the soil’s specific needs. For dense and compact soil, more aggressive techniques may be necessary to achieve the right depth and level.
Base Material Selection
Choosing the right base materials is also vital. The base should be compactable, durable, and provide a stable foundation for the pavers. Common options include crushed stone, gravel, and sand. Selecting the appropriate base material ensures the flooring is level, stable, and long-lasting.
By employing these ground preparation techniques, homeowners can lay a solid foundation for their outdoor flooring. Whether it’s for a patio, walkway, or driveway, proper preparation is essential. With the correct methods and materials, outdoor flooring can last for many years.
| Ground Preparation Step | Description |
|---|---|
| Soil Assessment | Evaluating soil type, density, and moisture levels |
| Excavation | Removing soil to achieve desired depth and level |
| Drainage Solutions | Implementing a drainage system or using permeable paver material |
| Base Material Selection | Choosing compactable, durable, and stable base materials |
Creating the Perfect Base Layer
In the realm of paver installation, a well-prepared base layer is essential. It ensures the patio’s stability and drainage. A solid base layer can handle the pavers’ weight and withstand various weather conditions. This is crucial for the patio’s longevity. In patio design, the base layer is often overlooked but is vital for project success.
To achieve the perfect base layer, compacted gravel or sand is necessary. This material forms a solid foundation for the pavers and facilitates proper drainage. Here are some key tips to remember:
- Choose the right material: Compacted gravel or sand is ideal for the base layer.
- Ensure the layer is level: Use a level to ensure the base layer is even and level.
- Compact the material: Use a plate compactor to compact the material and prevent settling.
In landscaping, a well-designed patio can significantly enhance the outdoor space’s beauty. By creating a perfect base layer, your patio pavers will endure for years.
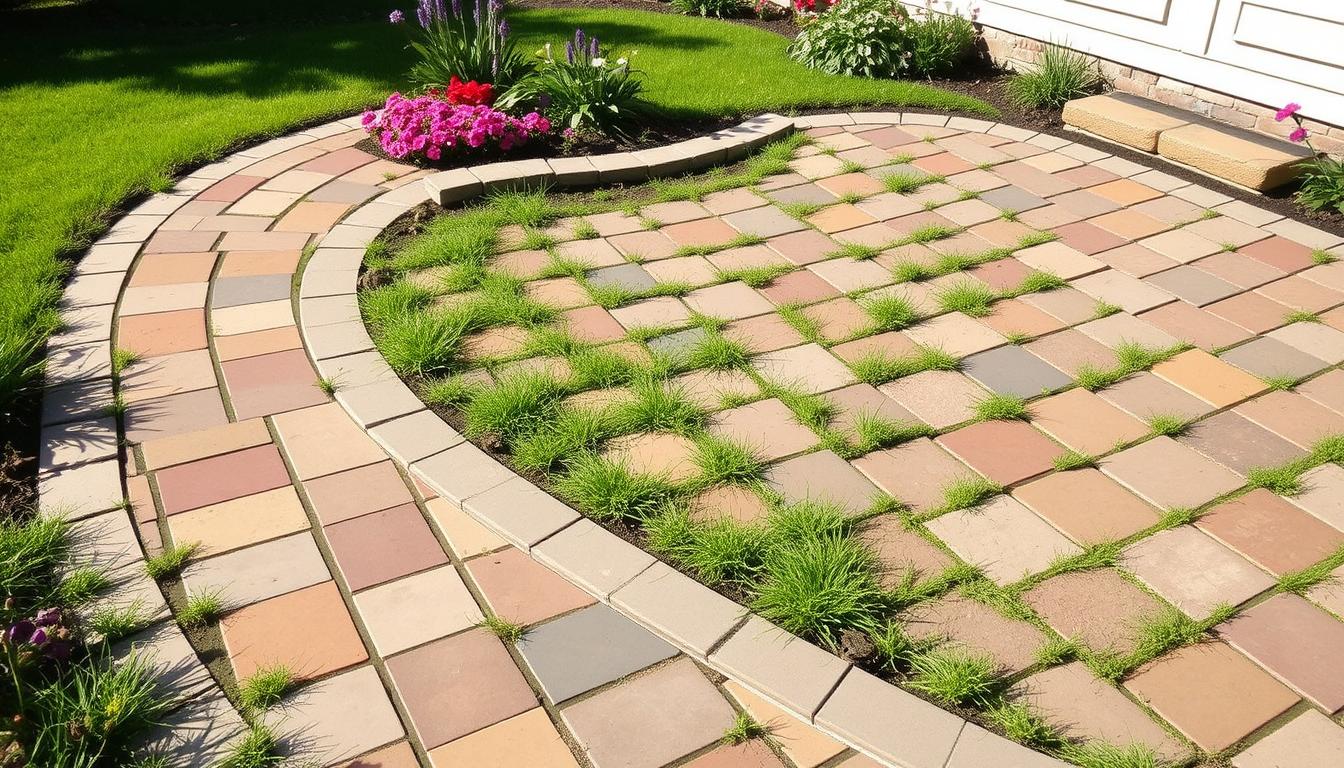
Professional Tips for Paver Pattern Design
Outdoor flooring can be transformed into a stunning space with paver patterns. Landscaping with pavers demands careful design and pattern selection for a professional finish. A well-chosen paver pattern can enhance the entire outdoor area, making it both harmonious and inviting.
The herringbone and running bond patterns are favorites for their beauty and durability. To personalize further, consider color coordination to align pavers with the landscape and decor.
Popular Pattern Styles
- Herringbone pattern: a classic and timeless design that adds a touch of sophistication to any outdoor space
- Running bond pattern: a simple yet effective design that creates a sense of continuity and flow
- Brick pattern: a traditional design that adds a touch of warmth and character to the outdoor flooring
Color Coordination Strategies
To achieve a cohesive look, match the paver colors with the landscape. Earthy tones like brown and beige blend well with nature. Bold colors like blue and red can make a striking statement.
Border and Accent Options
Adding a border or accent can elevate the paver pattern’s visual appeal. Use contrasting colors or materials to add depth and dimension. The right paver pattern can turn outdoor flooring into a beautiful, functional space that complements the landscape.
| Paver Pattern | Description |
|---|---|
| Herringbone | A classic and timeless design that adds a touch of sophistication |
| Running Bond | A simple yet effective design that creates a sense of continuity and flow |
Step-by-Step Patio Pavers Installation Guide
With preparation done, it’s time to begin the paver installation. This includes setting edge restraints, laying the first row of pavers, and ensuring proper spacing. Achieving a professional look requires attention to detail.
Setting the Edge Restraints
Setting the edge restraints is the first step. They prevent pavers from shifting or becoming uneven. It’s crucial to use the right materials for a stable and lasting outdoor flooring.
Laying the First Row
Laying the first row of pavers is key to the project’s success. Maintaining proper spacing and alignment is essential for a professional finish. While DIY paver installation is possible, following the right steps is crucial for success.
Maintaining Proper Spacing
Maintaining proper spacing between pavers is vital. This involves using the right materials and tools for even spacing and alignment. By following these steps, you can create a professional-looking outdoor flooring that will last for years.
Cutting and Fitting Pavers Like a Pro
In paver installation, cutting and fitting pavers is key to a seamless, professional finish. This is vital for outdoor flooring projects, aiming for beauty and function. To succeed, mastering the right techniques and tools is essential.
Here are some tips for cutting and fitting pavers:
- Use a diamond blade saw for accurate, efficient cuts.
- Apply sand to ensure pavers fit together perfectly.
- Employ a level for proper alignment and levelness.
These strategies can lead to a professional finish for your landscaping project.
By adhering to these tips and utilizing the correct tools, you can craft a lasting, beautiful outdoor space. Always prioritize safety with power tools. Take your time for precise cuts and fitting to guarantee a flawless fit.
Sand Selection and Joint Filling Methods
In the realm of outdoor flooring, the joints between pavers are as crucial as the pavers themselves. These spaces are vital for stability and weed prevention, keeping your landscaping pristine. Choosing the right joint sand and applying it correctly is essential.
Joint sand options include polymeric sand and regular silica sand. Polymeric sand is favored for its superior stability and durability. Regular silica sand, while more budget-friendly, still ensures good drainage and compaction.
Types of Joint Sand
- Polymeric sand: Provides excellent stability and durability
- Regular silica sand: Offers good drainage and compaction at an affordable price
Applying joint sand requires professional techniques for optimal results. This involves sweeping the sand into the joints, compacting it with a plate compactor, and sealing the joints. This process prevents weed growth and erosion.
Professional Application Techniques
By adhering to these steps and choosing the right joint sand, you can achieve a stunning and lasting outdoor flooring system. Whether you’re setting up a new paver pattern or updating an existing one, the correct sand and application methods are key.
| Joint Sand Type | Benefits | Application Techniques |
|---|---|---|
| Polymeric Sand | Excellent stability and durability | Sweeping, compacting, and sealing |
| Regular Silica Sand | Good drainage and compaction | Sweeping, compacting, and sealing |
Compacting and Settling Your Pavers
After laying pavers, it’s vital to compact and settle them for stability and even distribution. This step is key in paver installation, preventing shifting and unevenness in outdoor flooring.
Compacting pavers in layers promotes proper settlement, making the patio safe and durable. A plate compactor is essential for achieving the right compaction. Here are some tips for compacting and settling pavers:
- Compact the pavers in layers, starting from the bottom layer
- Use a plate compactor to achieve the perfect compaction
- Allow for proper settlement and ensure the patio is safe and durable
Final leveling is also crucial to guarantee that the pavers are perfectly aligned and level. By following these tips and using the right equipment, you can ensure that your outdoor flooring is stable, durable, and looks great.
Maintaining Your New Paver Patio
Proper paver maintenance is crucial to extend your outdoor flooring’s life. Regular cleaning, sealing, and checking for damage can prevent bigger issues. By following these maintenance tips, homeowners can enjoy their paver patio for years, keeping it beautiful and functional.
Some key tips for maintaining your paver patio include:
- Regularly sweeping and cleaning the pavers to prevent dirt and debris buildup
- Sealing the pavers to protect them from the elements and stains
- Inspecting the pavers for damage and addressing issues promptly
By incorporating these tips into your landscaping routine, you can keep your paver patio looking its best. Remember to also consider the overall design and functionality of your outdoor space when performing paver maintenance tasks.
With proper care and attention, your paver patio can remain a beautiful and functional part of your outdoor flooring for years to come.
Conclusion: Enjoying Your Professional-Looking DIY Paver Patio
Creating a stunning patio pavers oasis on a DIY budget is now within reach. You’ve learned about the unique benefits and types of outdoor flooring. This knowledge lets you transform your outdoor space into a true reflection of your style and vision.
You’ve gained confidence and skills to bring your dream patio pavers project to life. By following the step-by-step guidance, your final results will look like they were done by seasoned professionals. This leaves you with immense pride and accomplishment.
Now, it’s time to enjoy the beauty of your newly created outdoor oasis. Invite family and friends, host memorable gatherings, and revel in your DIY budget paver patio. The journey was rewarding, but the true joy is in enjoying it for years to come.