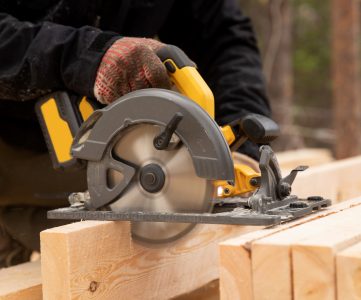
A power planer is vital for any DIY woodworking project, enabling you to smooth wood surfaces efficiently. For DIY enthusiasts, the right power planer is key to achieving professional-quality results. By mastering the right techniques and safety measures, you can fully utilize your power planer. This will elevate your woodworking skills significantly. Whether tackling a small project or a major renovation, a power planer is indispensable.
A power planer is versatile, smoothing out rough wood and creating flawless finishes. This guide will cover power planer basics, their role in DIY woodworking, and their benefits. We’ll explore safety, techniques, and maintenance, ensuring you understand how to maximize your power planer’s potential.
Key Takeaways
- Investing in a power planer can elevate your DIY woodworking projects
- Power planers are essential DIY smoothing tools for achieving professional-quality results
- Safety precautions and proper techniques are crucial when using a power planer
- Regular maintenance is necessary to extend the lifespan of your power planer
- With the right power planer and techniques, you can achieve smooth and flawless wood surfaces
Understanding the Power Planer’s Role in Woodworking
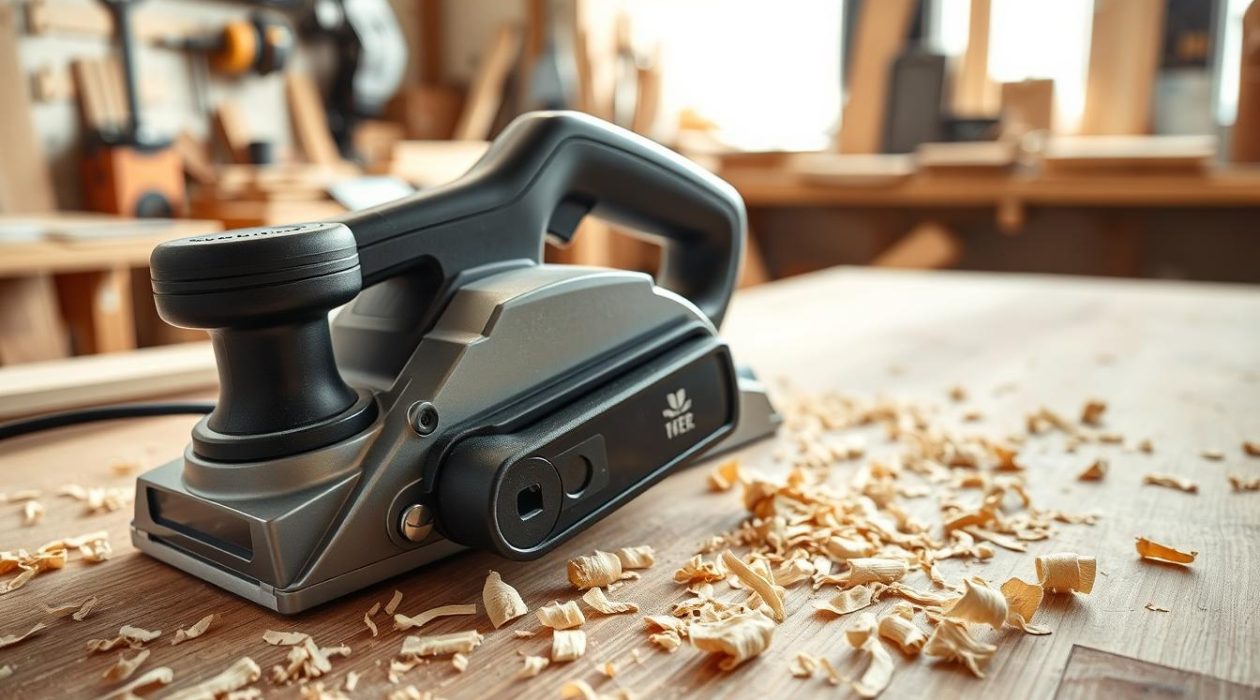
A power planer is a vital tool in woodworking, essential for smoothing wood surfaces. It’s crucial for various woodworking tasks, offering precision and efficiency. Understanding its types, components, and features is key to maximizing its use.
Planer tips are essential for achieving professional-quality results in woodworking. A power planer helps woodworkers remove imperfections and achieve uniform finishes. With the right tips, you can enhance your power planer’s performance, elevating your woodworking projects.
Types of Power Planers Available
There are several power planer types, each with unique features and benefits. Handheld, benchtop, and floor-standing planers are common. Choose based on project size, precision, and power needs.
Key Components and Features
A power planer has a motor, blade, and feed system. The motor powers the blade, while the feed system guides the wood. Consider speed, depth control, and dust collection when selecting a planer.
When to Choose a Power Planer Over Other Tools
A power planer is ideal for certain tasks. It’s perfect for large or thick wood pieces, offering the power and precision needed. It’s also great for removing old finishes and preparing surfaces for staining or finishing. Choose a power planer based on your project’s specific needs.
Essential Safety Measures Before Starting
When working with power planers, safety is paramount. To minimize risks and ensure a smooth experience, it’s crucial to follow power planer safety guidelines and DIY smoothing tools best practices. Before starting any project, make sure you have the necessary personal protective equipment, such as safety glasses, ear protection, and a dust mask.
A well-organized workshop is also essential for safe and efficient work. Keep your workspace clean and clear of clutter to avoid accidents and injuries. Ensure that your power planer is properly maintained and stored when not in use.
Here are some key safety measures to consider:
- Read the manufacturer’s instructions carefully before using your power planer
- Wear protective gear, including gloves and a face shield
- Keep loose clothing and long hair tied back
- Avoid overreaching and maintain a stable stance
By following these power planer safety tips and DIY smoothing tools best practices, you can ensure a safe and successful project. Always prioritize your safety and the safety of those around you.
For more information on power planer safety and DIY smoothing tools best practices, consult the manufacturer’s guidelines and online resources. With the right knowledge and precautions, you can achieve professional-quality results while maintaining a safe working environment.
| Safety Measure | Importance |
|---|---|
| Wearing protective gear | High |
| Proper workshop organization | Medium |
| Regular power planer maintenance | High |
Preparing Your Power Planer for First Use
For a smooth and safe first use of your power planer, following key planer tips is essential. Ensure you have all parts and have read the manual. This will guide you through the power planer assembly and how to assemble it correctly.
Here are some critical steps to follow:
- Inspect the power planer for any damage or defects
- Assemble the tool according to the manufacturer’s instructions
- Adjust and align the blade for optimal performance
A well-assembled power planer is crucial for professional-quality results. By adhering to these planer tips and ensuring proper assembly and inspection, you’ll have a safe and successful first experience.
Always follow the manufacturer’s instructions and take necessary safety precautions when using power tools. With proper power planer assembly and practice, you’ll achieve smooth, professional-quality results.
| Step | Description |
|---|---|
| 1 | Inspect the power planer for damage or defects |
| 2 | Assemble the tool according to the manufacturer’s instructions |
| 3 | Adjust and align the blade for optimal performance |
Basic Power Planer Techniques for Smooth Results
To achieve smooth results with a power planer, mastering basic techniques is crucial. Holding the device correctly, with a firm grip and steady hand, is key. This ensures better control and stability, leading to an even finish.
Maintaining consistent pressure and speed when moving the power planer across wood is essential. Too much pressure can cause unevenness, while too little may not remove enough material. Woodworking tools, like power planers, need practice to use effectively. So, don’t get discouraged if it takes a few tries to get it right.
Here are some tips for beginners:
- Start with a low speed setting and gradually increase as needed
- Use a push stick or other safety device to keep hands away from the blade
- Keep the power planer well-maintained, with regular cleaning and blade sharpening
By following these guidelines and practicing, you’ll achieve smooth, professional-looking results in your woodworking projects.
Remember, successful power planer usage combines proper technique, patience, and practice. With these basics, you’ll be well on your way to creating beautiful, smooth wood surfaces with your power planer and other woodworking tools.
Advanced Surface Smoothing Methods
To achieve professional-looking results, mastering advanced surface smoothing methods is essential. This includes using DIY smoothing tools and following planer tips for smooth finishes. By doing so, you’ll be able to tackle complex woodworking projects with confidence.
When working with different wood types, understanding their unique characteristics is crucial. For instance, hardwoods like oak and maple require a different approach than softwoods like pine and fir. By adjusting your technique and using the right DIY smoothing tools, you can achieve ultra-smooth finishes that showcase the natural beauty of the wood.
- Cross-grain planing: This technique involves planing against the wood grain to remove imperfections and achieve a smooth finish.
- Wood type: Different wood types require unique approaches to smoothing, so it’s essential to research and understand the characteristics of the wood you’re working with.
- Planer tips: Following planer tips for smooth finishes can help you achieve professional-looking results and avoid common mistakes.
By mastering these advanced surface smoothing methods and using the right DIY smoothing tools, you’ll be able to take your woodworking projects to the next level. You’ll achieve stunning, professional-looking results.
Troubleshooting Common Power Planer Problems
Working with power planers can sometimes lead to issues that slow down your woodworking projects. It’s crucial to find the source of these problems and fix them. Learning to troubleshoot woodworking tools can save you a lot of time and frustration.
Common problems with power planers include uneven surfaces, damaged blades, and motor malfunctions. Begin by examining the power planer’s settings and adjustments. Make sure the blade is correctly aligned and locked in place. Also, ensure the planer is set to the right depth and speed for your task.
A list of common power planers issues and their solutions includes:
- Uneven surfaces: Check the planer’s blade for damage or uneven wear, and adjust the planer’s settings as needed.
- Blade damage: Inspect the blade for signs of wear or damage, and replace it if necessary.
- Motor malfunction: Check the power planer’s motor for signs of wear or damage, and consult the user manual or contact the manufacturer for troubleshooting guidance.
By using these troubleshooting techniques, you can quickly solve common power planer problems. This will help you get your projects back on track. Always follow safety guidelines and manufacturer instructions when using power planers and other woodworking tools.
Maintaining Your Power Planer for Longevity
To keep your power planer a valuable asset in your workshop, regular maintenance is key. By adhering to planer tips for maintenance, you can extend its lifespan and maintain its performance. DIY smoothing tools care is vital to avoid damage and ensure optimal function.
Regular cleaning is a fundamental aspect of power planer upkeep. It involves removing dust and debris from the planer’s components, like the blades and motor. Proper cleaning prevents damage and ensures smooth operation. A well-maintained power planer also delivers superior results with less effort.
Regular Cleaning Procedures
- Remove dust and debris from the planer’s components
- Clean the blades and motor regularly
- Check for any damage or wear on the planer’s parts
By sticking to these maintenance tips and DIY smoothing tools care, your power planer will stay in top shape. Proper upkeep prevents damage and maintains performance. This allows you to achieve professional-quality results consistently.
Special Applications and Projects
A power planer is crucial for woodworking projects, offering versatility beyond basic smoothing. It’s perfect for tackling complex tasks with ease. You can use it for door fitting, trimming, creating beveled edges, and adjusting thickness.
In woodworking, precision is paramount. A power planer ensures professional-grade results. For example, it’s great for trimming doors to fit perfectly or creating beveled edges for a decorative look.
Some special applications of power planers include:
- Door fitting and trimming: Use a power planer to trim doors to the perfect size.
- Creating beveled edges: Add a decorative touch to your woodworking projects with beveled edges.
- Thickness adjustment: Adjust the thickness of wooden surfaces with ease using a power planer.
Exploring these applications can open new doors in your woodworking projects. Whether you’re experienced or new, a power planer is essential for achieving top-notch results.
With the right techniques and applications, you can create stunning woodworking projects. These projects will showcase your skills and creativity. So, don’t hesitate to experiment and explore the limits of your power planer.
| Power Planer Application | Description |
|---|---|
| Door Fitting and Trimming | Trim doors to fit perfectly into doorframes |
| Creating Beveled Edges | Add a decorative touch to wooden surfaces |
| Thickness Adjustment | Adjust the thickness of wooden surfaces with ease |
Accessories and Upgrades for Your Power Planer
To boost your power planer’s performance and functionality, look into power planer accessories and DIY smoothing tools upgrades. Options include new blades, dust collection systems, and adjustable fences. The right choices can enhance your tool’s efficiency and accuracy, leading to professional-grade results.
Some top power planer accessories include:
- Replacement blades for better cutting
- Dust collection systems for less mess and safety
- Adjustable fences for better accuracy and control
When picking DIY smoothing tools upgrades, think about your project’s needs. For big or complex wood, consider a strong dust collection system or a precise fence. Upgrading your power planer with the right tools can elevate your DIY projects, achieving smooth, professional finishes.
Investing in the right power planer accessories and DIY smoothing tools upgrades unlocks your power planer’s full potential. Whether you’re an experienced woodworker or new to DIY, the right upgrades can significantly improve your work’s quality and efficiency.
| Accessory/Upgrade | Description | Benefits |
|---|---|---|
| Replacement Blades | Improved cutting performance and extended blade life | Increased efficiency and reduced maintenance |
| Dust Collection Systems | Reduced mess and improved safety | Improved working conditions and reduced cleanup time |
| Adjustable Fences | Increased accuracy and control | Improved precision and reduced error |
Environmental and Dust Collection Considerations
Working with a power planer requires careful thought about environmental and dust collection. Ensuring woodworking tools safety is paramount. It’s crucial to consider power planer environmental factors to keep your workshop clean and healthy. Proper dust management is essential to avoid respiratory issues and maintain a clean workspace.
A well-designed dust management system can significantly reduce dust and debris from the power planer. This includes using a dust collector or vacuum system tailored for woodworking. Regular upkeep of these systems is necessary to ensure they operate effectively.
Dust Management Systems
- Centralized dust collection systems
- Portable dust collectors
- Vacuum systems with HEPA filters
Workshop Ventilation Requirements
Proper workshop ventilation is key to removing airborne dust and debris. Installing vents or windows for good airflow is essential. Using a power planer with a built-in dust collection system also helps minimize dust in the air.
By prioritizing woodworking tools safety and environmental considerations, you can ensure a safe and healthy workshop. Always adhere to the manufacturer’s guidelines for dust management and ventilation. This will help maintain a clean and efficient workspace.
| Dust Management System | Workshop Ventilation Requirement |
|---|---|
| Centralized dust collection | Good airflow through vents or windows |
| Portable dust collector | Adequate ventilation to remove airborne dust |
Mastering Your Power Planer for Professional-Quality Results
Throughout this detailed guide, you’ve discovered the importance of mastering the power planer. It’s crucial for achieving professional-quality wood surfaces. By grasping the tool’s capabilities, practicing safe operation, and keeping it well-maintained, you’re on the path to smooth finishes. These finishes will impress even seasoned woodworkers.
Remember, power planer mastery hinges on honing your technique. Experiment with various wood types, planing methods, and blade settings to discover what suits your projects best. Combine your power planer with effective dust collection and ventilation systems for a clean, safe workspace. With persistence and commitment, you’ll master planer tips for professionals, including beveling, thickness adjustments, and precise edge trimming.
The power planer is a versatile, powerful tool that can take your DIY woodworking to new levels. By adopting the techniques and best practices from this guide, you’re set to achieve flawless, professional-grade results consistently. Keep learning, practicing, and enjoy the pride of creating beautifully smooth wood surfaces with your reliable power planer.