Installing recessed lighting might seem hard, but with the right tools and knowledge, you can get great results at home. Recessed lighting, like can lights, can make a room look better and provide the right lighting. It’s a smart and fun way to light up a room or your whole house.
With the right help, you can make a lighting system that looks good and works well. We’ll show you how to pick the right lights and install them correctly.
Key Takeaways
- DIY recessed lighting can help you achieve professional-grade results at home
- Can lights are a popular choice for recessed lighting
- Proper ceiling installation is crucial for a successful DIY project
- Recessed lighting can enhance the ambiance of a room
- DIY recessed lighting is a cost-effective and rewarding project
- Choosing the right fixtures is essential for a beautiful and functional lighting system
Understanding Recessed Lighting Basics
Recessed lighting is a favorite among homeowners for its sleek look. To get a professional look, you need to know the basics. This includes the different types of recessed lights and where to use them. A good lighting layout is key to the right feel and function in a room.
There are many recessed lighting options. You can choose from baffle trim, reflector trim, and decorative trim. Each has its own role in the lighting’s look and feel. For instance, baffle trim cuts down on glare, while reflector trim boosts light downwards. A spacing guide helps figure out where to put recessed lights.
When picking recessed lighting, think about energy use, lifespan, and environmental impact. LEDs are getting popular for being energy-smart and lasting long. Here’s why LEDs are good for recessed lighting:
- Energy efficiency: LEDs use much less energy than old lights
- Long lifespan: LEDs can go up to 50,000 hours or more
- Environmental benefits: LEDs don’t have harmful chemicals and can be recycled
Knowing the basics of recessed lighting and thinking about lighting layout and spacing guide helps you make a great lighting system at home. Next, we’ll look at the tools and materials you’ll need for a DIY install.
| Type of Trim | Purpose |
|---|---|
| Baffle Trim | Reduces glare |
| Reflector Trim | Increases downward light |
| Decorative Trim | Enhances aesthetic appeal |
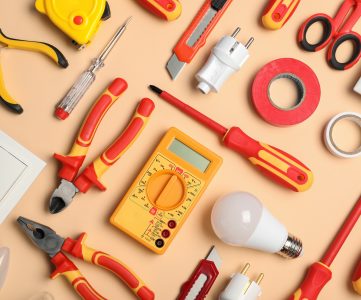
Essential Tools and Materials for Installation
To do a DIY recessed lighting project right, you need the right installation tools and materials. You’ll need basic tools like drills and screwdrivers. Also, you’ll need special tools like hole saws and fish tape. Having the right materials, like recessed lighting fixtures, wiring, and connectors, saves time and makes the job easier.
A good checklist of tools and materials includes:
- Drill and bits
- Screwdrivers (flathead and Phillips)
- Hole saws
- Fish tape
- Wire strippers
- Pliers and wrenches
- Recessed lighting fixtures
- Wiring and connectors
- Fasteners (screws, clips, etc.)
Using the right installation tools makes the job faster and better. It’s also key to have the right materials to avoid mistakes and ensure safety.
Being ready with the right tools and materials lets you finish your DIY recessed lighting project with confidence. Always follow safety rules and the manufacturer’s instructions when working with electrical systems and installation tools.
Planning Your Lighting Layout
Planning is crucial for a well-designed lighting scheme. A good layout can greatly improve your space’s ambiance and function. Think about the activities in each room and the lighting needed for them.
Ensuring dimmer compatibility is key. Choose dimmers that work with your recessed lights. This lets you adjust light levels for different tasks and moods. Dimmers make your lighting system more flexible and energy-efficient.
Room Mapping Techniques
Visualize your lighting layout with a room map. Just sketch a floor plan and mark recessed lights, furniture, and other important features. When mapping your room, consider:
- Task areas, like reading nooks or kitchen countertops
- Ambient lighting zones, such as hallways or living areas
- Accent lighting opportunities, like display shelves or artwork
Optimal Light Spacing Guidelines
To ensure even and pleasing lighting, follow these spacing guidelines for recessed lights:
- Space lights 2-3 feet apart for task areas
- Space lights 4-6 feet apart for ambient lighting zones
- Use a mix of light sources for a layered lighting effect
By following these guidelines and considering dimmer compatibility, you can create a professional lighting design. It will enhance your space’s beauty and function.
Safety Considerations and Electrical Requirements
When working with electrical systems, safety is key. This is true when installing DIY recessed lighting, like pot lights. To ensure a safe and successful installation, it’s crucial to take the right precautions. You must also follow local electrical codes and standards.
Before starting, turn off the power supply to the area where you’ll install the pot lights. This step prevents accidental electrical shocks or injuries. Also, use a voltage tester to check that the power is off before you start.
Some important safety considerations and electrical requirements for DIY recessed lighting include:
- Always follow the manufacturer’s instructions for the specific pot lights you’re using
- Ensure that the installation complies with local electrical codes and standards
- Use the correct voltage and wattage for your pot lights to prevent overheating or electrical fires
By taking the necessary safety precautions and following electrical requirements, you can have a successful and safe DIY recessed lighting installation. Always prioritize safety when working with electrical systems. If you’re unsure about any part of the installation, don’t hesitate to consult a professional.
Step-by-Step Recessed Lighting Installation
Installing recessed lighting is easy if you know the steps. First, gather all your tools and materials. This includes your can lights and a good ceiling installation guide. Then, turn off the power at the main electrical panel to stay safe.
Next, mark the location of your can lights on the ceiling. Think about the best spacing and layout for your room. Use a drill to make a small pilot hole. Then, cut out the drywall with a drywall saw for your can light hole. Be careful not to harm any surrounding areas or wiring.
After cutting the holes, it’s time to wire your can lights. Connect the wires to the power supply, following all safety rules and local electrical codes. Then, install the housing and trim for your can lights. Make sure they are securely in place for a professional look.
Key Installation Steps:
- Mark the location of your can lights on the ceiling
- Cut out the drywall to create holes for your can lights
- Wire your can lights to the power supply
- Install the housing and trim for your can lights
By following these steps and being careful, you can install recessed lighting safely and successfully. This will improve your space’s ambiance and function with your new can lights and ceiling installation.
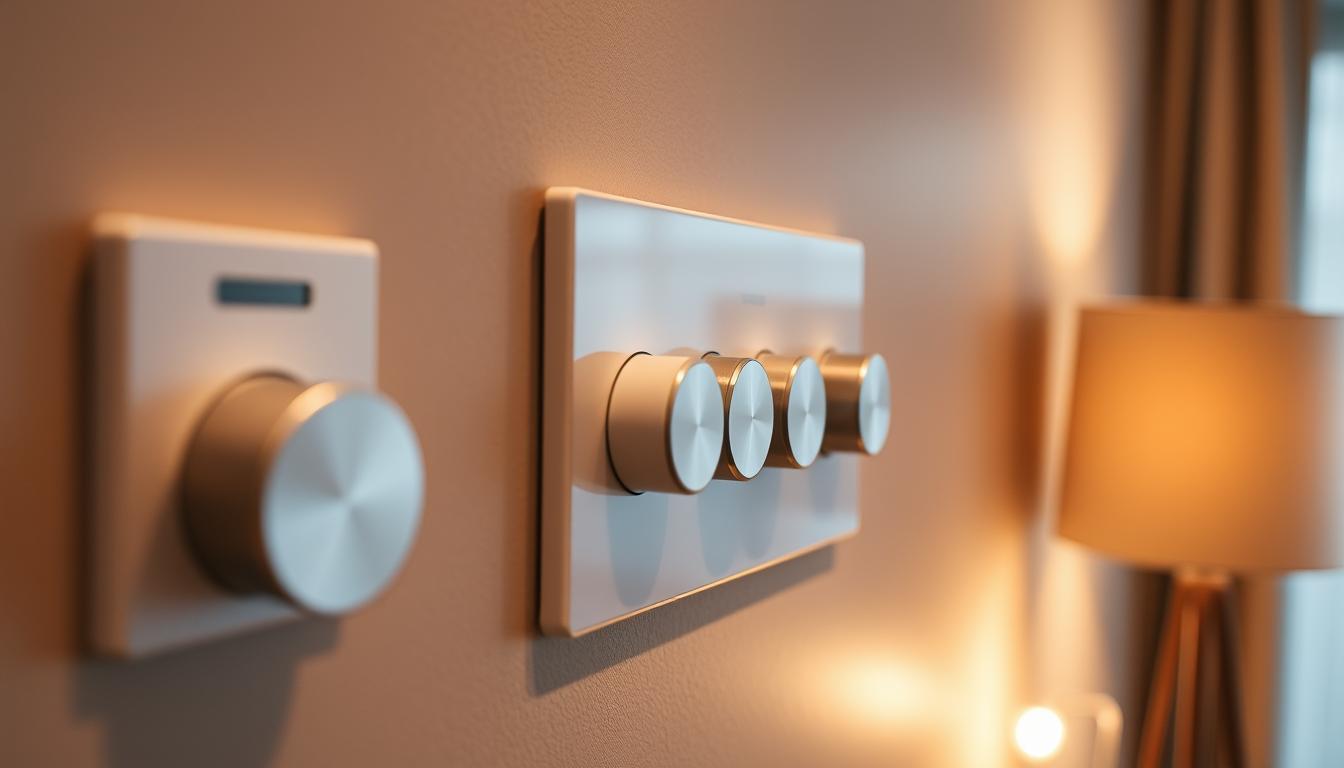
Choosing the Right Dimmer System
Choosing the right dimmer system is key to a great DIY recessed lighting project. A good dimmer system can change how your space feels and works. It’s important to think about dimmer compatibility with your recessed lights.
A compatible dimmer system works well with your lights and doesn’t harm them. When picking a dimmer, look at the type of switch, its wattage, and if it fits your lights.
Compatibility Considerations
- Check the dimmer switch’s compatibility with your recessed light fixtures
- Verify the wattage rating of the dimmer switch
- Ensure the dimmer switch is compatible with your lighting control system
By looking at these points and picking a compatible dimmer, you’ll have a smooth and efficient lighting setup. The right dimmer lets you change light levels for any mood, saving energy too.
Smart Home Integration Options
Many dimmer systems today can connect to smart homes. This means you can control lights from afar or with voice commands. This adds ease, saves energy, and makes your space look better. When picking a dimmer, think about these smart home features and pick what fits your lifestyle.
Troubleshooting Common Installation Problems
DIY recessed lighting can sometimes go wrong, even with good planning. Knowing common problems and how to fix them is key. Uneven lighting is a big issue, often due to not following a spacing guide well. This can mess up the room’s feel.
To fix this, use the right installation tools and stick to a good spacing guide. Here are some common problems and how to solve them:
- Incorrect hole cutting: Double-check your measurements to ensure accurate hole cutting.
- Insufficient wire connection: Verify that all wire connections are secure and meet electrical requirements.
- Improper trim installation: Ensure that the trim is installed correctly, and the recessed light is securely fastened.
Knowing these common problems and taking the right steps can make your DIY project a success. Always follow the manufacturer’s instructions and take your time with electrical work. With the right installation tools and a good spacing guide, you’ll get great results and enjoy your new recessed lighting.
| Common Issue | Solution |
|---|---|
| Uneven lighting | Adjust the spacing guide and reposition the recessed lights as needed |
| Insufficient lighting | Add more recessed lights or consider using higher-wattage bulbs |
| Electrical issues | Verify wire connections and consult a licensed electrician if necessary |
Maintenance and Care Tips
To keep your DIY recessed lighting in top shape, regular maintenance is crucial. Clean your pot lights often to avoid dust buildup and keep them shining. Use a soft cloth and a gentle cleaning solution to wipe down the fixtures.
Replacing bulbs is simple but requires a few steps. First, switch off the power at the circuit breaker or fuse box. Let the bulb cool down before removing it. Then, twist it counterclockwise to remove it. Replace it with a new one, twisting it clockwise to secure it.
Cleaning Procedures
- Dust the pot lights with a soft cloth to prevent scratches
- Use a gentle cleaning solution to wipe down the fixtures
- Avoid using harsh chemicals or abrasive materials that can damage the lights
Bulb Replacement Guide
- Turn off the power to the lighting system
- Allow the bulb to cool down before removing it
- Twist the bulb counterclockwise to release it from the socket
- Replace the old bulb with a new one, tightening it in a clockwise direction
Long-term Performance Optimization
To keep your recessed lighting system running well, regular checks and maintenance are key. Replace bulbs as needed and clean the fixtures to prevent dust. By following these tips, your lighting will stay bright and functional for years.
| Maintenance Task | Frequency |
|---|---|
| Cleaning the pot lights | Every 2-3 months |
| Replacing bulbs | As needed |
| Checking the lighting system | Every 6 months |
Conclusion: Enjoying Your Professional-Grade Lighting Installation
As you look around your beautifully lit home, you must feel proud. You saved money and made your living spaces more beautiful and functional. Planning the lighting layout, installing the ceiling, and setting up the dimmer system were all worth it.
Now, your home is filled with energy-efficient lighting. You have more control over the mood and style of your interiors. You followed a detailed guide and solved any problems that came up. Enjoy the feeling of a job well done and be proud of your new lighting.