A good garage electrical setup is key for a safe and efficient workshop. It’s important to think about the power needs of your tools and equipment. This ensures your electrical system is well-designed.
A well-planned garage wiring system keeps your workshop safe and running smoothly. It’s important for both DIY fans and professionals.
Having a well-designed electrical setup saves you time and money. It reduces the risk of electrical fires and other dangers. By planning your wiring, you create a safe and efficient workshop that meets your needs.
Key Takeaways
- A proper garage electrical setup is essential for a safe and efficient workshop setup
- Garage wiring should be designed to meet the power requirements of your tools and equipment
- A well-planned garage electrical setup can help you avoid electrical hazards
- A proper garage electrical setup can help you save time and money in the long run
- A well-designed garage electrical setup can increase your workshop’s productivity and safety
Understanding Garage Power Requirements
To figure out the right power for your garage, think about the tools and equipment you’ll use. Workshops need different amounts of power, and knowing this is key for safety and efficiency. The power your garage needs depends on the tools you’ll use, like drills, saws, and sanders.
When figuring out your total power use, add up each tool’s power needs and how many you’ll use at once. This helps you know how much power your garage needs. For example, a woodworking shop might need more power than a metalworking shop because of the different tools used.
Basic Power Needs for Different Workshop Types
- Woodworking shops: typically require 15-20 amps of power
- Metalworking shops: typically require 20-30 amps of power
- Auto repair shops: typically require 30-50 amps of power
Calculating Your Total Power Usage
To find your total power use, add up each tool’s power needs. This total tells you how much power your garage needs. Make sure your electrical setup can handle this power.
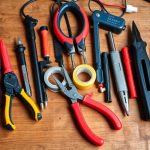
Common Tool Power Requirements
Some common tools and their power needs are: drills (2-5 amps), saws (5-10 amps), and sanders (3-5 amps). Knowing your tools’ power needs helps ensure your garage’s electrical setup is enough. This way, you get the power you need for your workshop.
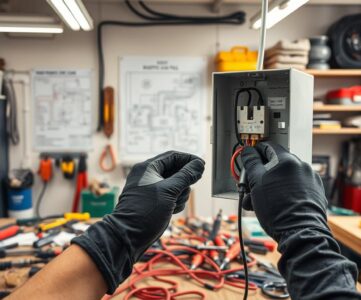
Assessing Your Current Electrical Setup
To make your workshop safe and efficient, you need to check your electrical layout. Look at where outlets, switches, and circuit breakers are. This helps spot problems and where you can improve. A good electrical setup prevents accidents and makes sure your tools work right.
When checking your electrical setup, think about these things:
- Outlet placement: Are outlets easy to reach and use?
- Switch placement: Are switches in a safe spot?
- Circuit breaker placement: Is the circuit breaker panel easy to find and organized?
By carefully looking at your electrical layout, you can see what changes you need. This helps you make your workshop safer and more efficient. Knowing your current setup lets you make smart choices to improve it.
Important things to consider include the wiring type and rating, circuit breaker capacity, and GFCI outlet locations. By evaluating your electrical setup and making upgrades, you ensure a safe and productive workshop.
| Electrical Component | Considerations |
|---|---|
| Outlets | Placement, type, and rating |
| Switches | Placement, type, and rating |
| Circuit Breakers | Capacity, type, and location |
Essential Components for Workshop Wiring
Garage wiring needs the right parts for a safe and reliable system. This includes the main service panel, circuit breakers, and the right wiring. Good circuit planning is key to avoid overloading and ensure your workshop runs well.
A well-thought-out wiring system starts with a main service panel. It should be in a spot that’s easy to get to and safe from the weather. Choosing the right circuit breakers is also crucial to prevent electrical overloads and fires.
Some important things to think about for workshop wiring are:
- Wiring types and ratings: Pick wiring that fits your power needs and the workshop environment.
- Circuit breaker requirements: Choose breakers that can handle your workshop’s power and protect against overloads and fires.
- Garage wiring layout: Plan your wiring layout to be safe, efficient, and easy to keep up.
Understanding the key components of workshop wiring helps create a safe and reliable system. This setup prevents electrical dangers and keeps your workshop ready to go.
| Component | Description |
|---|---|
| Main Service Panel | The main electrical panel that distributes power to your workshop. |
| Circuit Breakers | Devices that protect against electrical overloads and fires. |
| Wiring Types and Ratings | The type and rating of wiring used in your workshop, which should be suitable for the environment and power requirements. |
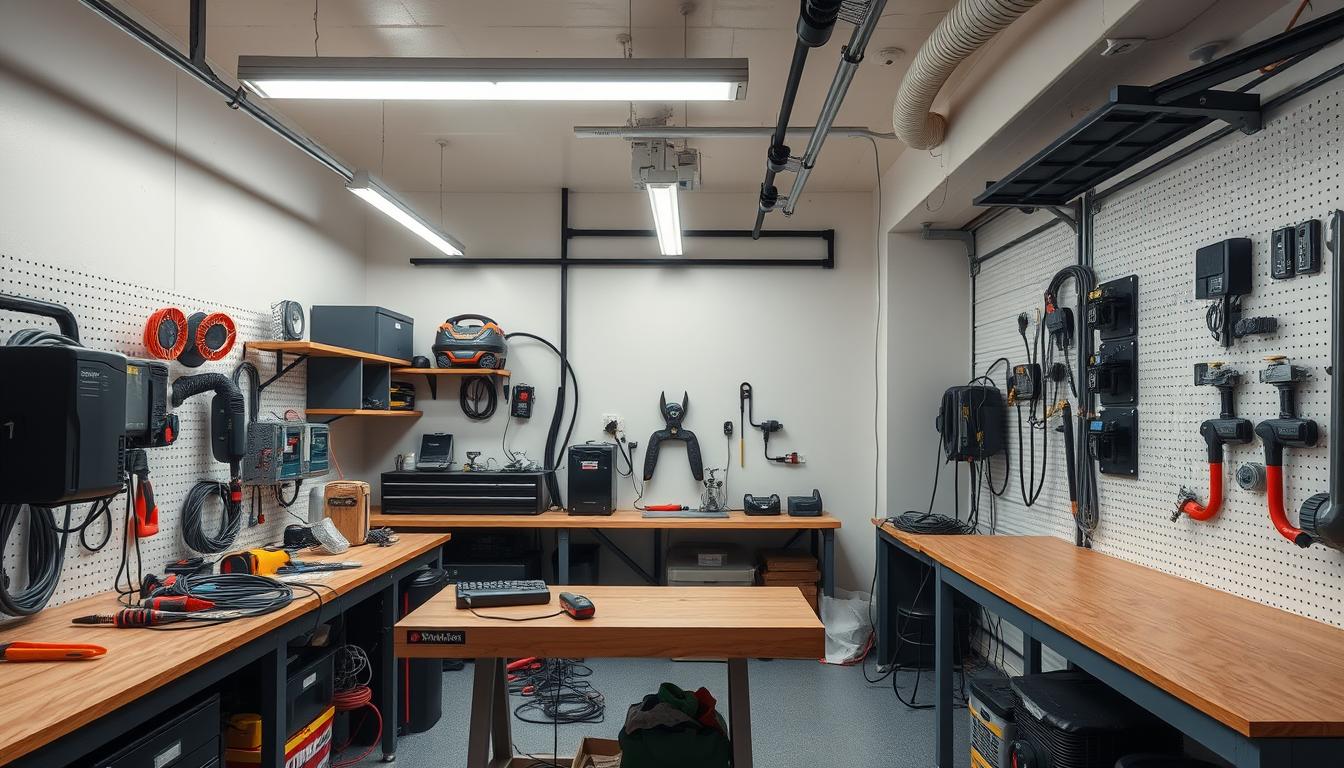
Planning Your Electrical Layout
Setting up a workshop needs a good electrical layout for safety and efficiency. It should fit your workshop’s needs, considering where tools and equipment will go. A well-planned layout makes sure your workshop is bright and tools are easy to reach.
To plan your electrical layout, list all your tools and their power needs. Think about where each tool will go and plan your layout. Choose the right wiring and outlets for your workshop.
- Power needs for each tool and equipment
- Where tools and equipment will go
- The type of wiring and outlets you need
- How your workstations will be laid out
By thinking about these points and planning well, you can make a safe and efficient workshop. Always follow local electrical rules and get help from a licensed electrician if needed.
Power Distribution and Outlet Placement
Setting up a garage workshop needs careful thought about power distribution and outlet placement. Knowing what power your tools need is key to a safe and efficient setup. It’s also important to follow safety rules, like using GFCI protection zones, to avoid accidents and meet local laws.
Plan your power system with outlets in mind, based on your tools’ needs. For big tools, you might need 220V outlets. But for smaller stuff, 110V outlets are enough. This way, you get a system that works well and keeps you safe.
- Know what power each tool needs. Different tools require different amounts of power.
- Include safety features like GFCI zones to prevent accidents and follow local rules.
- Put outlets in safe spots to avoid accidents and make it easy to get power.
With careful planning, you can make a safe and efficient electrical system. This meets your needs and follows local rules. It helps you avoid dangers and makes your garage workshop run smoothly.
| Tool Type | Power Requirement | Outlet Type |
|---|---|---|
| Drill | 110V | Standard Outlet |
| Circular Saw | 220V | Heavy-Duty Outlet |
| Sander | 110V | Standard Outlet |
Lighting Solutions for Workshop Efficiency
Proper lighting is key in a workshop for safety and efficiency. It helps prevent eye strain and reduces accident risks. We’ll look at different lighting options for your garage workshop, like overhead, task, and natural lighting.
Choosing the right lighting is important for your electrical layout. Overhead lights provide general light, while task lights focus on specific areas. Natural light can be increased with skylights or bigger windows.
These lights vary in brightness, energy use, and durability. Think about lumen output, color, and dimming when picking lights. This helps make your workshop comfortable and effective.
With the right electrical layout and lighting, your workshop will be safe and functional. This setup boosts your efficiency, cuts down on mistakes, and makes your work more enjoyable.
| Lighting Type | Lumen Output | Energy Efficiency |
|---|---|---|
| LED Strips | 1000-2000 lumens | High |
| Fluorescent Lights | 2000-4000 lumens | Medium |
| Halogen Lamps | 400-1000 lumens | Low |
Safety Features and Code Compliance
Garage wiring must prioritize safety. A good electrical system prevents accidents and keeps the work area safe. It’s crucial to think about safety measures, local codes, and insurance.
Important safety features include ground fault circuit interrupters (GFCIs) and arc fault circuit interrupters (AFCIs). These devices stop electrical shocks and fires. Also, use high-quality wiring materials that follow local codes.
Required Safety Measures
- Install GFCIs in areas where water is present, such as near sinks or bathrooms
- Use AFCIs to protect against arc faults and electrical fires
- Ensure all wiring is properly insulated and secured
Local Code Requirements
Knowing local garage wiring codes is essential. These rules change by location, so check with local authorities. Here are some common requirements:
| Requirement | Description |
|---|---|
| Permitting | Get necessary permits before starting your garage wiring project |
| Inspections | Book regular inspections to check if you follow local codes |
By following these safety tips and local codes, you can make a safe and compliant garage wiring setup. It will meet your needs and protect your family.
Special Considerations for Power Tools
When setting up a garage workshop, it’s key to think about power tools’ needs. You must know the tool power needed for different tasks. Also, make sure your electrical setup can handle these power requirements. A well-thought-out workshop boosts efficiency and safety.
It’s vital to check each power tool’s specific needs. For example, dust collection systems need a lot of tool power to work well. Here are some important points for power tools:
- Dust collection systems: These systems need a special circuit and enough power requirements to work right.
- Air compressor setup: Air compressors need a steady tool power supply to work safely and right.
- Welding equipment requirements: Welding gear has special power requirements that must be met for safe and efficient use.
Understanding these special needs helps make a safe and efficient workshop. It’s also wise to talk to experts and follow local rules to make sure your workshop meets all standards.
Creating a well-planned workshop is crucial for any project. By thinking about power tools’ special needs and making sure your electrical setup meets them, you can make a space that’s both useful and safe.
| Power Tool | Tool Power Required | Power Requirements |
|---|---|---|
| Dust Collection System | 2-3 HP | 120V, 20A |
| Air Compressor | 1-2 HP | 120V, 15A |
| Welding Equipment | 3-5 HP | 240V, 30A |
Future-Proofing Your Workshop
Setting up a workshop means thinking about the future. A good workshop setup keeps your space useful and efficient. It’s about planning for growth, upgrades, and changes in power needs.
A flexible electrical layout is key for a workshop’s changing needs. Future-proofing your workshop means a safe, efficient electrical system. Here are some ways to do it:
- Install a modular electrical system for easy upgrades or expansions.
- Choose durable materials that last a long time.
- Think about smart technology to save energy and improve efficiency.
A well-thought-out workshop setup and electrical layout are vital. They make your workspace safe, efficient, and productive. Future-proofing your workshop ensures it stays useful and effective for years.
Conclusion: Maximizing Your Garage Power Setup
Creating the perfect garage power setup is key for a productive and safe workshop. You need to know your power needs, check your current electrical system, and plan well. This way, you can make a setup that works now and in the future.
Details matter when setting up your garage power. Choose the right circuit breakers and wiring. Make sure outlets and lights are in the best spots. Keeping safety and codes in mind ensures your workshop runs smoothly and safely.
Now, you have the tools to turn your garage into a productive space. Customize your electrical setup to reach your workspace’s full potential. Get creative and take on projects with confidence, knowing your garage power is ready for success.