Trim painting is vital in woodwork finishing, transforming a room’s look. With the right techniques and tools, you can achieve professional-looking trim painting. It demands attention to detail and a deep understanding of the process, from preparation to painting.
Mastering trim painting can enhance your woodwork’s beauty, creating a polished finish. Whether you’re a DIY enthusiast or a professional contractor, knowing the best practices is crucial. This article will explore techniques and best practices for perfect trim painting. We’ll discuss essential tools and surface preparation for a successful project.
Introduction to Trim Painting
Trim painting is a key part of woodwork finishing, needing skill and attention to detail. By using the right techniques and tools, you can achieve perfect trim painting. This can greatly enhance a room’s look. We’ll cover the essential aspects of achieving professional-looking results in trim painting and woodwork finishing.
Key Takeaways
- Trim painting is a crucial aspect of woodwork finishing
- Mastering trim painting techniques can elevate the overall look of a room
- Attention to detail is essential for achieving perfect trim painting
- Using the right tools and techniques is critical for a successful trim painting project
- Surface preparation is a key aspect of trim painting
- Trim painting requires a thorough understanding of the process, from preparation to painting
Essential Tools for Professional Trim Painting
For crisp lines and a professional finish, the right trim tools are key. A quality set of brushes, tape, and edge tools significantly impacts your work’s quality. When it comes to detail work, selecting the correct brush is critical. Consider bristle type, size, and shape to ensure the best fit for your project.
Tools like tape and edge tools are also vital for clean lines and sharp edges. A tape selection guide can help you pick the right tape for your needs. Edge tools, on the other hand, are essential for precise edges and corners. Don’t forget ladders, drop cloths, and sanding blocks for a safe and successful painting experience.
Brush Selection Guide
- Choose the right bristle type for your paint
- Select the right brush size for your trim
- Consider the shape of the brush for corners and edges
Tape and Edge Tools
Using the right tape and edge tools is crucial for clean lines and sharp edges. Opt for tape designed for painting. Edge tools are also necessary for creating precise edges and corners.
Additional Equipment Needs
Beyond trim tools and detail work equipment, other supplies are necessary. Ladders, drop cloths, and sanding blocks are all important. Choose the right equipment for your needs to ensure a safe and successful painting experience.
Understanding Different Types of Trim
When diving into trim painting, it’s vital to grasp the various trim types. These can be crafted from wood or MDF, each with distinct traits and needs for woodwork finishing.
Trim categories include baseboards, door and window frames, and crown molding. Each presents unique painting challenges. For instance, baseboards endure heavy wear, while crown molding’s detailed design makes painting a delicate task.
To achieve a polished finish, selecting the correct paint and methods for each trim type is crucial. Here are some essential tips:
- Opt for high-quality paint that matches the trim material
- Ensure the surface is clean and sanded before painting
- Apply paint in thin layers, allowing each to dry before adding the next
By familiarizing yourself with trim varieties and employing the right techniques, you can achieve a stunning, professional finish. This will elevate your trim painting project and ensure top-notch woodwork finishing.
| Type of Trim | Material | Painting Tips |
|---|---|---|
| Baseboards | Wood or MDF | Use a durable paint and apply thin coats |
| Door and Window Trim | Wood or MDF | Use a paint that matches the surrounding walls and trim |
| Crown Molding | Wood or MDF | Use a high-quality paint and apply thin coats, using a small brush for intricate details |
Proper Surface Preparation Techniques
Before painting your trim, it’s crucial to prepare the surface properly. This ensures a smooth, even base for paint to adhere to, resulting in clean lines and a professional finish. Key steps include cleaning, sanding, filling gaps and holes, and applying primer.
Begin by cleaning the trim to remove dirt, grime, or grease. Use a mild detergent and water for this. After cleaning, sanding is necessary to smooth out rough edges or splinters. This step is vital for achieving clean lines and a smooth finish.
Cleaning and Sanding
- Use a mild detergent and water to clean the trim surface
- Sand the surface to smooth out any rough edges or splinters
- Wipe away any dust or debris with a clean cloth
Next, fill any gaps or holes in the trim. Use a filler or spackling compound for this. Once dry, sand it down for a smooth surface. Lastly, apply a primer to ensure the paint adheres evenly, resulting in a professional finish. These steps will help you achieve a smooth, even finish with clean lines.
Filling Gaps and Holes
Use a filler or spackling compound to fill gaps or holes. Sand the filler down for a smooth surface.
Priming Requirements
Apply a primer to the surface. This helps the paint adhere evenly, resulting in a professional finish.
| Step | Description |
|---|---|
| 1. Cleaning | Use a mild detergent and water to clean the trim surface |
| 2. Sanding | Sand the surface to smooth out any rough edges or splinters |
| 3. Filling Gaps and Holes | Use a filler or spackling compound to fill any gaps or holes in the trim surface |
| 4. Priming | Apply a primer to the surface to help the paint to adhere evenly |
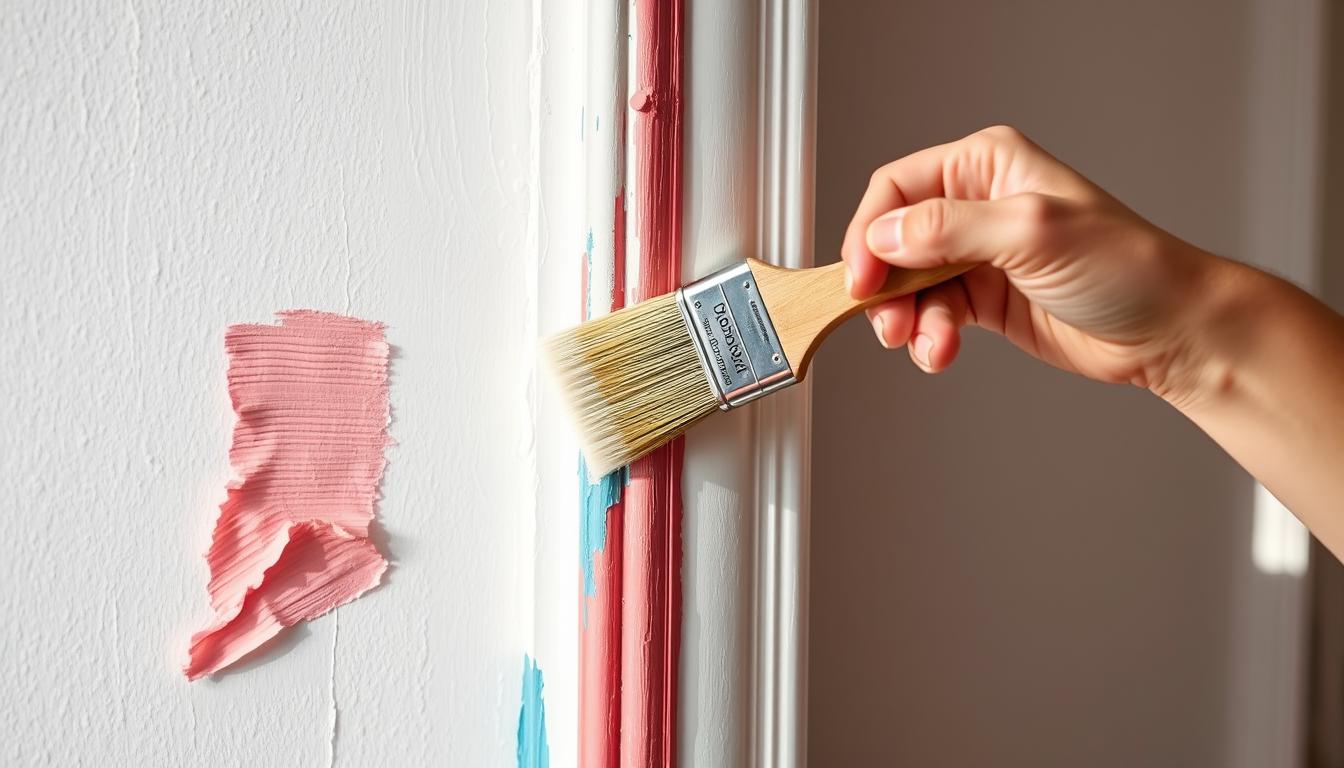
How to Paint Trim Like a Professional
To achieve a professional-looking trim painting, high-quality paint and the right brushstrokes are key. Precise painting demands attention to detail and a steady hand. Begin by preparing your surface, ensuring it’s clean and dry. Next, apply a primer if needed, and let it dry fully before painting.
For trim painting, the right amount of paint and smooth, even strokes are crucial. Choose a high-quality brush for trim work and work in small sections for even coverage. For crisp lines, opt for a paintbrush with synthetic bristles, which sharpens the edge.
- Use a level to ensure your paint lines are straight
- Work in a well-lit area to see any imperfections
- Use a small brush to paint intricate details
By adhering to these tips and mastering the right techniques, you can achieve a professional-lookingtrim painting that boosts your home’s beauty. Remember, precision in painting requires patience and attention to detail.
Mastering Tape Application Methods
To achieve clean lines and crisp edges, mastering tape application methods is essential. Tape techniques play a significant role in ensuring professional-looking results. When applying tape, it’s crucial to consider the type of surface and the desired outcome.
Proper tape alignment is vital to prevent paint from seeping under the tape. This can be achieved by applying the tape slowly and smoothly, ensuring it is straight and even. Sealing tape edges is also important to prevent paint from bleeding under the tape. This can be done by applying a small amount of paintable caulk to the edge of the tape.
Timing Tape Removal
Timing tape removal is critical to achieving clean lines. The tape should be removed immediately after painting, while the paint is still wet. This will help prevent the paint from drying on the tape, making it difficult to remove.
Some key considerations for mastering tape application methods include:
- Using the right type of tape for the surface
- Applying tape slowly and smoothly
- Sealing tape edges to prevent paint from bleeding
- Removing tape immediately after painting
By following these tips and techniques, you can achieve clean lines and crisp edges, making your paint job look professional and polished.
Paint Selection and Color Matching
Choosing the right paint and color is key for a professional trim finish. The paint type significantly affects the trim’s look. You can pick from latex or oil-based paints. Latex paints are water-based, easy to use, and clean up well. Oil-based paints, on the other hand, offer a hard, durable finish.
For woodwork finishing, picking a paint that matches the wood’s natural color and texture is crucial. A good starting point is to choose a paint color one to two shades lighter than the walls. This creates a nice contrast and highlights the trim. Popular colors for trim include white, cream, and gray.
Here are some tips for selecting the right paint and color for your trim:
- Consider the style and era of your home when choosing a paint color
- Think about the natural lighting in the room and how it will affect the color
- Test the paint color with a sample swatch before committing to a specific shade
By following these tips and choosing the right paint and color, you can achieve a beautiful and professional-looking finish for your trim.
Advanced Trim Painting Techniques
Detail work is key to achieving a professional finish. Precise painting techniques are essential for creating beautiful, lasting trim. Understanding brush stroke methods is crucial. Different strokes can produce smooth or textured finishes.
Corner treatment is a vital part of advanced trim painting. It requires specialized brushes and techniques for crisp, clean lines. Mastering these methods can elevate your trim’s appearance.
Dealing with Intricate Details
Working with intricate details demands patience and practice. The right tools and techniques are necessary for precise results. High-quality brushes, patience, and a steady hand are essential. These tips help achieve detailed, beautiful results.
Common techniques in advanced trim painting include:
- Using a level for straight lines
- Applying tape for crisp edges
- Paintbrush for filling small gaps and details
By incorporating these techniques, you can achieve professional results that last.
Precise painting focuses on detail. Mastering advanced techniques leads to beautiful, lasting results. These enhance your home’s appearance.
| Technique | Description |
|---|---|
| Brush Stroke Methods | Using different brush strokes to achieve various effects |
| Corner Treatment Approaches | Using specialized brushes and techniques to ensure crisp, clean lines |
| Dealing with Intricate Details | Using patience and practice to achieve precise painting results |
Common Mistakes to Avoid
Trim painting can be challenging, but avoiding common mistakes is key to achieving professional results. The first step is to prepare the surface correctly. Proper cleaning and sanding are crucial for a smooth finish. Using high-quality paint and brushes also significantly impacts the outcome.
Common errors in trim painting include:
- Choosing the wrong paint for the task
- Ignoring surface preparation
- Using subpar tools and materials
- Hurrying the process, neglecting paint drying time
Woodwork finishing is equally vital in trim painting. A well-finished woodwork enhances the room’s aesthetic. By dedicating time to proper preparation and painting, you’ll achieve a lasting, professional finish.
| Mistake | Consequence | Solution |
|---|---|---|
| Using the wrong type of paint | Uneven finish or peeling paint | Choose a high-quality paint designed for trim painting |
| Not preparing the surface properly | Rough or uneven finish | Properly clean and sand the surface before painting |
Troubleshooting Paint Trim Issues
Even seasoned professionals face challenges with trim painting. Achieving a flawless finish requires quick action to address these problems. Proper surface preparation is vital to avoid common issues like bleeds, drips, uneven coverage, and paint peeling.
Trim painting demands meticulous attention to detail. Understanding the causes of these issues helps prevent them. Using the correct tools and techniques minimizes errors. Also, ensuring the surface is clean and dry before painting prevents uneven coverage.
Fixing Bleeds and Drips
To tackle bleeds and drips, let the paint dry fully first. Then, use a small brush to touch up the area. Identifying the cause is crucial to prevent future occurrences. This might involve adjusting your technique or switching to a different paint.
Addressing Uneven Coverage
Uneven coverage stems from various factors, including poor preparation or incorrect paint choice. Begin by sanding the area to smooth it out. Next, apply a new coat of paint, focusing on the right amount and technique. Proper preparation is essential for even coverage and a professional finish.
Dealing with Paint Peeling
Paint peeling can be a significant challenge. It can be prevented by employing the right techniques and materials. To fix peeling, scrape off the loose paint and sand the area. Then, apply a new coat of paint, using high-quality primer and paint designed for trim.
By following these steps and ensuring proper surface preparation, you can achieve a stunning and durable finish.
| Issue | Cause | Solution |
|---|---|---|
| Bleeds and Drips | Incorrect paint application | Touch up with small brush, adjust technique |
| Uneven Coverage | Poor surface preparation, wrong paint type | Sand affected area, apply new coat of paint |
| Paint Peeling | Low-quality paint, poor surface preparation | Scrape off loose paint, sand, apply new coat of paint |
Maintaining Your Painted Trim
Keeping your trim painting in top condition is crucial. Regular cleaning and touch-ups can prevent damage and maintain its appearance. Start by dusting it with a soft cloth to avoid dirt accumulation.
For deeper cleaning, a mild detergent and water solution are recommended. Avoid harsh chemicals that can harm the paint. Addressing scratches or scuffs promptly is also vital to prevent them from worsening. This is where the importance of trim painting maintenance shines, protecting your investment and preserving the trim’s freshness.
- Regularly inspect your trim for signs of wear or damage
- Use a high-quality paint designed for trim painting
- Avoid using abrasive materials that can scratch the paint
By adhering to these guidelines and maintaining a regular upkeep routine, you can enjoy beautiful, enduring trim painting. It enhances your space’s look and feel. Remember, consistent maintenance is essential for extending your trim’s lifespan and maintaining its appearance.
| Maintenance Task | Frequency |
|---|---|
| Dusting | Weekly |
| Cleaning | Monthly |
| Touch-ups | As needed |
Special Considerations for Different Rooms
Different rooms in a house have unique needs when it comes to trim painting and woodwork finishing. For example, bathrooms with high moisture levels require paint that adheres well and lasts long. This ensures the paint job remains intact over time.
In high-traffic areas like hallways and living rooms, durable and easy-to-clean paint is crucial. Here are some key factors to consider for various rooms:
- Moisture levels: Bathrooms, kitchens, and laundry rooms need paint that can handle high humidity.
- Lighting: Rooms with lots of natural light may require paint that resists UV damage to prevent fading.
- Traffic: High-traffic areas benefit from paint that’s both durable and easy to clean.
By taking these factors into account, you can select the right paint and techniques for each room. This ensures a professional finish for your trim painting and woodwork finishing projects.
Always follow the manufacturer’s instructions for the paint and materials you use. Also, take necessary safety precautions to ensure a successful project.
| Room | Special Considerations |
|---|---|
| Bathroom | High moisture levels, choose paint with mold- and mildew-resistant properties |
| Kitchen | High traffic, choose durable and easy-to-clean paint |
| Living Room | Plenty of natural light, choose paint with UV-resistant properties |
Conclusion: Achieving Perfect Trim Every Time
As we conclude our journey through the art of professional trim painting, remember that the key to achieving perfect results lies in your dedication to preparation and attention to detail. From selecting the right tools to mastering advanced techniques, each step you’ve learned in this comprehensive guide is essential for producing a flawless, long-lasting finish on your trim.
By now, you should have a solid understanding of the proper way to trim paint like a seasoned pro. Whether you’re freshening up existing trim or tackling a new painting project, apply the principles you’ve discovered here. You’ll be well on your way to creating a polished, visually stunning space that reflects your commitment to quality.
Remember, practice makes perfect. Don’t be discouraged if your first few attempts don’t yield the desired outcome – with time and persistence, your trim painting skills will continue to improve. Embrace the journey, learn from your mistakes, and take pride in the beautiful results you achieve.
Now, go forth and unleash your inner trim painting artist. The perfect trim is within your reach, and we’re confident that with the knowledge you’ve gained, you’ll be able to transform any room into a showpiece of your exceptional craftsmanship.