For any DIY enthusiast or professional, a well-organized tool bench is crucial. It enhances efficiency and effectiveness in work. Constructing a DIY tool bench is a rewarding project. With proper guidance, you can design a tool bench that suits your needs. This article will walk you through planning, selecting materials, and building your tool bench.
Whether you’re an experienced DIYer or a beginner, a tool bench is essential. It offers a dedicated area for your hand tools, making them easily accessible. This reduces clutter and improves organization. By creating a custom tool bench, you tailor your workspace to your needs. This makes project work more efficient and enjoyable.
Key Takeaways
- Building a tool bench is a fun and rewarding DIY project
- A well-organized tool bench helps to work more efficiently and effectively
- A DIY tool bench provides a dedicated space to store and organize hand tools
- Building a custom tool bench allows you to create a workspace tailored to your needs
- A tool bench is a vital component of any workshop or garage
- By following the right guidance, you can create a tool bench that meets your specific needs
Planning Your Perfect Tool Bench
Planning is crucial when building a tool bench. You must evaluate the space and your tool storage needs. This ensures your bench is both functional and efficient. Organizing your tools is key to this process.
Begin by assessing your space needs. Consider your workshop’s size and the tools you’ll store. Think about the projects you’ll tackle and the tools needed. This will guide your bench’s size and layout. Tailor your design to fit your specific needs, as workbench ideas abound online and in magazines.
Assessing Your Space Requirements
Consider the following when evaluating your space:
- Workshop size
- Number of tools to store
- Type of projects you will be working on
Determining Tool Storage Needs
Reflect on the tools you’ll store and their usage frequency. This will help you choose the right storage solutions, like drawers or cabinets. A well-designed tool storage system keeps you organized and efficient.
Setting Your Budget
Lastly, establish a budget for your project. Account for material, tool, and feature costs. With a clear plan and budget, you can build a workbench that enhances your efficiency. By focusing on tool storage and workbench ideas, you’ll create a productive workspace.
Essential Materials and Tools Needed
To construct a tool bench, you’ll require a range of materials and tools. This list includes lumber, plywood, screws, nails, and essential power tools like saws, drills, and sanders. It’s vital to have all these materials and tools ready before starting your DIY tool bench project. This ensures a successful outcome.
Here’s a list of the key materials and tools you’ll need for your tool bench project:
- Lumber for the frame
- Plywood for the work surface
- Screws and nails for assembly
- Power tools such as a saw, drill, and sander
- Measuring and marking tools
When embarking on a DIY tool bench project, it’s crucial to consider the materials and tools you’ll use. This will guide you in choosing the best design and layout for your tool bench. With the right materials and tools, you can achieve a successful and efficient build.
Always adhere to safety guidelines and use proper techniques when working with power tools and building your tool bench. With the correct materials and tools, you can create a functional and efficient DIY tool bench that fulfills your needs.
Selecting the Right Location for Your Tool Bench
The location of your tool bench is critical for efficient workflow and safety in your workshop. Think about the workbench ideas you have and how they will fit into your space. A spot with good lighting and easy access to power outlets is key for organizing your tools and ensuring safety.
Choosing the right spot involves considering both natural and artificial lighting. Adequate lighting reduces eye strain and enhances visibility, making projects easier to tackle. Plus, being near a power source keeps your area tidy and minimizes tripping hazards.
Lighting Considerations
- Natural light: Position your tool bench near a window for natural illumination.
- Artificial light: Add overhead lighting or lamps to complement natural light.
Power Source Access
Make sure your tool bench is close to a power outlet. This keeps your workspace organized and safe. It also prevents accidents from cords or cables.
Workspace Flow
A well-designed workspace boosts productivity and efficiency. Think about your workspace’s flow and how your tool bench will fit into it. By planning your tool bench’s location carefully, you create a safe, efficient space that meets your needs and keeps you organized.
Building a Strong Foundation: The Basic Frame
Creating a tool storage starts with a solid frame. This is crucial for your tool bench to support all your tools and equipment. Begin by collecting your materials, such as lumber and screws. Opt for high-quality materials that can handle the weight of your tools.
A robust frame is the backbone of your tool bench. Focus on these essential elements:
- Frame size: It must be big enough to accommodate all your tools and equipment
- Material: Select durable lumber that can bear the weight of your tools
- Design: Aim for a design that is both simple and strong, making assembly and disassembly straightforward
As you embark on building a tool storage, remember that a strong frame is vital for a functional tool bench. With the appropriate materials and design, you’ll establish a firm base for your workshop.
| Material | Size | Weight Capacity |
|---|---|---|
| Lumber | 2×4 | 500 lbs |
| Plywood | 3/4 inch | 300 lbs |
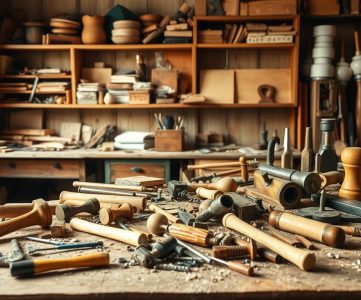
Creating Your Custom Tool Bench Surface
The surface of a DIY tool bench is crucial. It’s where you’ll spend most of your time working on projects. Choosing the right materials and finish is essential. A well-designed surface can significantly improve your productivity and workshop experience. Look into different workbench ideas to find the best one for you.
DIY tool benches can be made from wood, metal, or plastic. Each material has its own benefits and drawbacks. For instance, a wooden top is durable and easy to work with. On the other hand, a metal surface offers a sleek, modern look. Consider your project types and desired durability when picking a material.
Workbench Top Materials
- Wood: A popular choice for DIY tool benches, wood is durable and easy to work with.
- Metal: A metal surface can provide a sleek, modern look and is ideal for heavy-duty projects.
- Plastic: A plastic workbench top is lightweight, easy to clean, and resistant to scratches and spills.
Surface Treatment Options
After choosing your material, consider a surface treatment. This could be a finish, like polyurethane, or a texture, such as non-slip. A treated surface protects against damage, reduces maintenance, and enhances comfort.
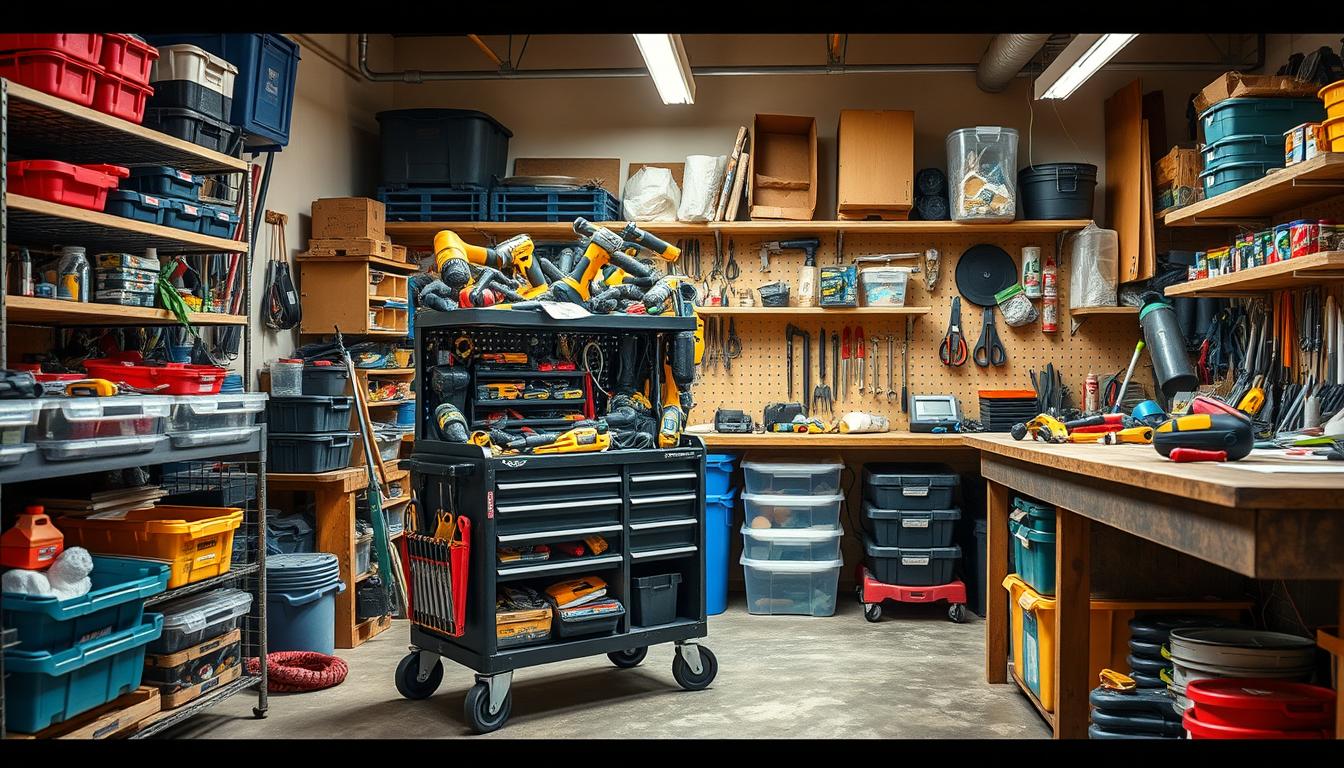
Installing Storage Solutions
Building a tool storage requires a well-organized tool bench. Installing drawers, shelves, and cabinets keeps tools accessible and boosts workspace efficiency.
Begin by assessing the tools you’ll store and their usage frequency. This will guide your choice of storage solutions. For instance, a pegboard suits frequently used tools, while cabinets are better for less often needed items.
Here are some tips for installing storage solutions:
- Measure your space carefully to ensure the storage solutions fit properly
- Choose storage solutions that are durable and easy to clean
- Consider the weight capacity of the storage solutions to ensure they can hold your tools
By adhering to these guidelines and selecting the right storage, you’ll create a tool bench that’s both functional and efficient. This setup will streamline your workflow, allowing you to concentrate on your projects and building a tool storage that suits your needs.
Always follow the manufacturer’s instructions when installing storage solutions. If you’re unsure about any part of the process, consider seeking professional assistance.
| Storage Solution | Benefits |
|---|---|
| Drawers | Easy access to tools, customizable storage |
| Shelves | Maximizes vertical space, easy to install |
| Cabinets | Secure storage, protects tools from dust and damage |
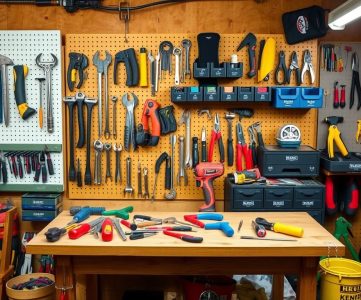
Adding Tool Organization Features
When it comes to organizing your tools, a well-designed tool bench is essential. Incorporating various tool organization features ensures your tools are within easy reach. This makes your work more efficient. A key consideration for workbench ideas is to create a space that is both functional and organized.
A pegboard is a great way to start organizing your tools. You can install a pegboard on the wall above your workbench or on the side of a cabinet. This provides a space to hang your frequently used tools, keeping them organized and easy to access.
Pegboard Installation
To install a pegboard, attach it to a sturdy surface using screws or nails. Ensure the pegboard is level and secure before hanging your tools.
Drawer Organization
Drawer organizers are another way to keep your tools organized. You can purchase drawer organizers designed for toolboxes or create your own using dividers and small containers.
Tool Holders and Brackets
Tool holders and brackets are crucial for organizing your tools. You can attach them to the wall or to the side of your workbench. This provides a convenient place to store your tools.
Incorporating these tool organization features into your workbench design creates a space that is both functional and efficient. Consider your specific needs and the types of tools you will use when designing your tool bench and organizing your tools. With planning and creativity, you can create a workbench idea that meets your needs and enhances your work efficiency.
Power Tool Integration and Safety Features
Building a DIY tool bench requires careful thought about power tool integration and safety. A well-thought-out tool bench enhances efficiency and safety, reducing the chance of accidents. It’s crucial for a productive workspace.
When integrating power tools into your tool bench, consider the tools you’ll use and available space. Tools like drill presses, sanders, and grinders are essential. Adding safety elements such as safety glasses, a first aid kit, and a fire extinguisher is also vital for a safe environment.
- Drill presses: ideal for drilling precise holes and driving screws
- Sanders: perfect for smoothing out wood and other materials
- Grinders: great for grinding and polishing metal and other surfaces
Always adhere to safety guidelines when using power tools. Keep your tool bench organized and free from clutter. By focusing on power tool integration and safety, your DIY tool bench becomes a safe and efficient workspace. It supports your projects and meets your needs effectively.
A well-designed tool bench is not just a piece of furniture, but a key component of a safe and efficient workshop. By considering power tool integration and safety features, you can create a workspace that helps you work smarter, not harder.
Customizing Your Tool Bench for Specific Projects
When building a tool storage, it’s crucial to think about the projects you’ll tackle. A tailored tool bench boosts efficiency and effectiveness. Add modular parts and specialized storage to fit your needs perfectly.
Consider adding a vice, drill press, or sanding station to your bench. Storage bins, shelves, or drawers also help keep tools and materials in order. Customizing your bench reduces clutter, boosts productivity, and enhances your work experience.
- Improved efficiency: A customized tool bench makes tools and materials easily accessible, saving time and effort.
- Enhanced organization: Modular components and storage areas keep your workspace tidy and organized.
- Increased productivity: A well-designed bench enables faster project completion and better results.
Investing in a customized tool bench pays off. It creates a workspace tailored to your needs, helping you reach your goals. Whether you’re a contractor or a DIY enthusiast, a customized bench significantly improves your work experience.
| Tool Bench Component | Benefits |
|---|---|
| Modular Components | Improved flexibility and customization |
| Specialized Storage Areas | Enhanced organization and reduced clutter |
| Workbench Surface | Increased durability and ease of maintenance |
Maintenance and Upkeep of Your Tool Bench
To keep your tool bench in top shape, regular maintenance is key. This means setting up a routine for cleaning and protecting its surface. Such actions prevent damage and keep your tool bench a valuable asset in your workshop.
For effective organizing your tools, a well-maintained tool bench is essential. A clean, organized bench allows for quick tool access, boosting productivity and saving time. Begin by wiping the surface with a soft cloth and mild detergent to remove dirt, dust, and debris.
Regular Cleaning Routine
Establishing a regular cleaning schedule is crucial to avoid dirt and grime buildup on your tool bench. Follow these steps:
- Dust the tool bench regularly to prevent dirt and debris accumulation
- Wipe down the surface with a soft cloth and mild detergent
- Dry the surface thoroughly to prevent water spots
Surface Protection Tips
To safeguard your tool bench’s surface, consider applying a protective coating or finish. This will shield against scratches and damage from spills or accidents. Also, keep your tool bench away from direct sunlight and moisture to prevent warping or discoloration.
By adhering to these maintenance tips, your tool bench will remain in excellent condition. Always prioritize organizing your tools and maintaining your tool bench to maximize your workshop’s potential.
| Tool Bench Maintenance Tips | Frequency |
|---|---|
| Regular cleaning | Daily/Weekly |
| Surface protection | Monthly |
| Inspection | Quarterly |
Making the Most of Your New Workshop Setup
Congratulations on finishing your DIY tool bench project! You’ve crafted a customized, functional workspace. It will boost your woodworking and home improvement projects for years. By planning tool storage, choosing the right materials, and adding organizational solutions, you’ve built a workbench that fits your needs perfectly.
Now, start enjoying your new workshop setup. Remember to keep your DIY tool bench in top shape. Clean it regularly, protect the surface, and make sure your tools are easy to access. With proper care, your custom workbench will be the cornerstone for many creative projects.
We hope this guide has inspired and equipped you to turn your workshop into a highly efficient, organized space. Dive into the possibilities your personalized workbench offers. Let your creativity soar to new heights.