In painting projects, a quality paint primer is vital for a flawless finish. It’s a necessity, as it ensures the paint adheres well. This guide will cover the importance of paint primer, highlighting when it’s needed and when it can be skipped.
A paint primer is essential for a successful paint job. It creates a smooth surface for paint to adhere to, significantly improving the final look. Whether you’re painting a new surface or covering an old one, primer ensures a professional finish.
Introduction to Paint Primer
Understanding primer’s role in painting is crucial for achieving the desired outcome. Primer helps form a strong bond between paint and surface, preventing peeling or flaking. While it’s often necessary, there are times when you can do without it. We’ll explore these scenarios in this guide.
Key Takeaways
- Paint primer is essential for a flawless paint job
- Primer necessity depends on the surface and paint type
- A good paint primer can make a big difference in the final result
- Primer helps to create a smooth, even surface for paint
- Using a paint primer can reduce the risk of peeling or flaking
- There are situations where you can skip using a primer
Understanding Paint Primer: The Foundation of Perfect Paint Jobs
A flawless paint finish requires a solid foundation. This is where primer types come into play, offering a strong base for paint adhesion. A primer is a specialized coating applied before painting. It ensures a strong bond between the surface and the paint.
The science behind primer adhesion is complex but simple to understand. Primer creates a strong chemical bond with the surface. This allows paint to adhere evenly, preventing peeling or flaking. It’s crucial when using different primer types, like oil-based or latex-based, each with unique characteristics.
To choose the right primer, understanding the different types is essential. Common primer types include:
- Oil-based primers, ideal for surfaces facing heavy wear and tear
- Latex-based primers, water-soluble and easy to clean up
- Shellac-based primers, often used on wood surfaces
Selecting the right primer ensures a strong paint foundation. This leads to a beautiful, long-lasting finish.
Why Skipping Primer Might Cost You More in the Long Run
When painting, primer application is vital and should never be skipped. Neglecting primer can cause issues like uneven paint, reduced durability, and increased peeling risk. These problems can lead to more costs, as you might need to repaint sooner than expected.
To achieve a lasting, quality paint job, using a primer to sealing surfaces is essential. It ensures a strong paint-to-surface bond, lowering peeling and flaking risks. A good primer saves time and money in the long run.
Key benefits of primer use include:
- Improved paint adhesion
- Increased paint durability
- Enhanced paint finish
- Reduced risk of paint peeling
Primer is a critical painting step. It guarantees a professional finish that lasts for years. So, don’t overlook this step. Invest in a quality primer for a superior paint job.
Essential Types of Paint Primer for Different Surfaces
For a successful paint job, surface preparation is key. Choosing the right primer is a critical step in this process. With numerous primer types on the market, selecting the correct one for your surface can be daunting. This section will guide you through the various primers suitable for different surfaces.
Here are some of the most common primer types:
- Oil-Based Primers: suitable for wood and metal surfaces
- Latex-Based Primers: ideal for drywall and plaster surfaces
- Shellac-Based Primers: often used for wood and furniture surfaces
- Specialty Primers: designed for specific surfaces such as concrete or masonry
Selecting the right primer ensures a strong bond between the primer and paint. This results in a durable and lasting finish. Proper surface preparation and primer application are vital for a successful paint job.
Always follow the manufacturer’s instructions for your chosen primer. Also, ensure you take necessary safety precautions for a safe and successful painting experience.
| Primer Type | Suitable Surfaces | Characteristics |
|---|---|---|
| Oil-Based Primers | Wood, Metal | Strong adhesion, durable finish |
| Latex-Based Primers | Drywall, Plaster | Easy to clean up, low odor |
| Shellac-Based Primers | Wood, Furniture | Fast-drying, non-toxic |
| Specialty Primers | Concrete, Masonry | Highly durable, resistant to moisture |
Must-Prime Scenarios: When Primer Is Non-Negotiable
Primer is essential for a smooth, durable paint finish. It’s crucial for optimal paint adhesion and a uniform base coat. For example, when painting over dark colors or bold patterns, primer is vital. It covers the existing color, preventing it from bleeding through the new paint.
In new construction, primer is a must for a strong paint bond. New surfaces often have a porous or uneven texture, impacting paint adhesion. A primer creates a smooth, even surface for painting, ensuring a professional finish.
Some common must-prime scenarios include:
- Painting over stains or water damage
- Painting over bold patterns or dark colors
- New construction or renovation projects
- Painting surfaces with uneven or porous textures
In these scenarios, primer is indispensable. It ensures a strong bond between paint and surface, leading to a durable finish. Primer also improves paint adhesion, reducing peeling or flaking risks.
Understanding when primer is non-negotiable helps in making informed painting project decisions. Whether painting a room or a house, primer is key for a smooth, durable finish.
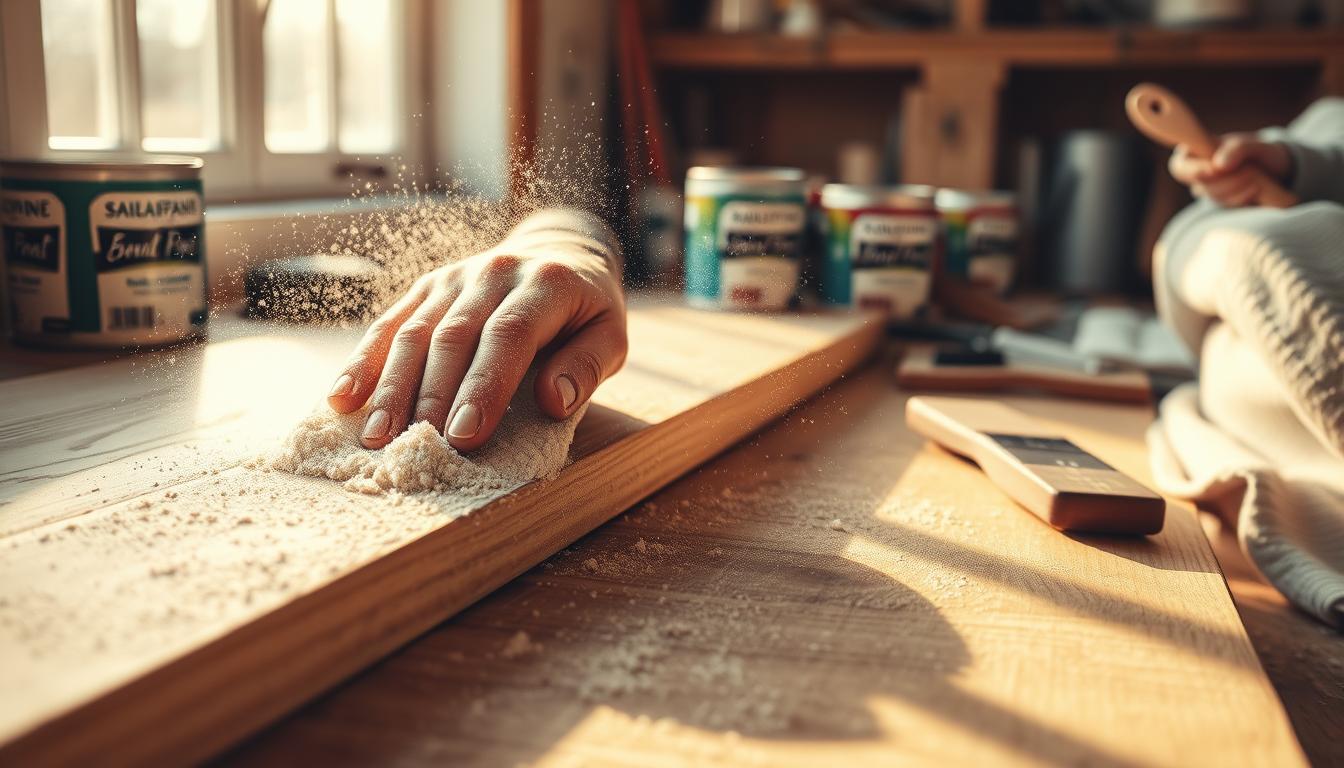
Surface Preparation: The Key to Successful Priming
Effective priming starts with proper surface preparation. It’s essential to clean, dry, and clear the surface of debris before primer application. This step is crucial for a strong bond between the surface and the primer, impacting the paint job’s quality. Surface preparation involves cleaning, sanding, and controlling moisture levels.
Cleaning requirements are paramount in surface preparation. It’s necessary to remove dirt, grime, and other substances that could hinder primer application. A clean surface ensures even primer adhesion, leading to a smooth finish. Following sanding guidelines is also crucial to create a surface ready for primer bonding. This step lays a solid foundation for the paint job.
Controlling moisture levels is also vital in surface preparation. Excess moisture can cause poor primer adhesion, leading to a weak paint job. By following these steps, individuals can ensure their surface is ready for primer application. This leads to a successful and long-lasting paint job. Effective surface preparation and primer application are key to achieving a professional-looking finish.
Cleaning Requirements
- Remove dirt and grime from the surface
- Use a mild detergent and water to clean the surface
- Rinse the surface thoroughly and allow it to dry
Sanding Guidelines
- Use a fine-grit sandpaper to smooth out the surface
- Sand in a circular motion to avoid creating scratches
- Wipe away dust and debris after sanding
Common Primer Application Mistakes to Avoid
When applying primer, several common mistakes can lead to subpar results. One major error is not letting the primer dry fully before painting. This can cause the paint to peel or flake, wasting effort and money. Always follow the manufacturer’s drying time guidelines and test the surface before painting.
Another mistake is applying too much primer, resulting in a thick, uneven coat. This is a big issue when sealing surfaces that need a smooth finish. Use a high-quality primer and apply it in thin, even layers. Allow each layer to dry before adding the next. It’s crucial to choose the right primer for your surface to ensure proper adhesion and a successful paint job.
Common mistakes to watch out for include:
- Not preparing the surface properly before applying primer
- Using the wrong primer for the surface or environment
- Applying primer in thick, uneven coats
- Not allowing the primer to dry completely before painting
To avoid these mistakes and ensure a successful primer application, follow the manufacturer’s instructions. Prioritize sealing surfaces properly to prevent damage and achieve a smooth finish.
The Right Tools for Primer Application
Having the right tools is crucial for a smooth, even primer application. This is vital for a strong paint foundation. The right tools can significantly impact the final look, making it professional.
Consider the surface type when choosing tools. Different surfaces need different tools, like brushes, rollers, or sprayers. Brush selection is key for trim work and cutting in. Roller options are ideal for large, flat areas. Sprayer considerations are important for quick, efficient primer application on big surfaces.
Key factors to consider in tool selection include:
- Surface type: Different surfaces require different tools, such as brushes, rollers, or sprayers.
- Primer type: The type of primer you’re using can also impact your tool selection.
- Area size: The size of the area you’re working with will also influence your tool choice.
Choosing the right tools ensures a strong paint foundation and a professional finish. Remember to consider the surface type, primer type, and area size when selecting your tools.
| Tool | Surface Type | Primer Type | Area Size |
|---|---|---|---|
| Brush | Trim work, cutting in | Latex, oil-based | Small to medium |
| Roller | Large, flat areas | Latex, oil-based | Medium to large |
| Sprayer | Large, complex areas | Latex, oil-based | Large |
When You Can Skip the Primer: Exceptions to the Rule
In some cases, you might not need a primer, depending on the primer types and the surface. Knowing when a primer is necessary can guide your decision-making.
There are times when you can skip primer, like when using self-priming paints or painting over surfaces that are already painted and in good shape. The crucial step is to evaluate the surface and decide if a primer is needed.
Self-Priming Paints
Some paints come with self-priming properties, making a separate primer unnecessary. These are often used on surfaces that are in good condition and don’t need strong adhesion.
Previously Painted Surfaces
If the surface has been painted before and is still in good condition, you might not need a primer. Yet, it’s vital to consider the primer types from the previous paint job and the current paint’s primer necessity.
When thinking about skipping primer, consider the surface preparation, paint type, and the outcome you want. By understanding the primer necessity and primer types, you can make a well-informed choice. This will help you achieve a successful paint job.
Expert Tips for Perfect Primer Application
When it comes to primer application, a well-prepared surface is essential. This is where surface preparation comes in – a crucial step that can make all the difference in the final result. To achieve a professional-looking finish, it’s essential to follow some expert tips and tricks.
First, choose the right primer for your specific needs. Consider the type of surface you’re working with, as well as the desired finish. Then, make sure to clean and sand the surface thoroughly to create a smooth, even base for the primer.
- Applying a thin, even coat of primer to avoid drips and unevenness
- Allowing the primer to dry completely before applying paint
- Using a high-quality primer that is specificially designed for your surface type
By following these expert tips and taking the time to properly prepare your surface, you’ll be able to achieve a beautiful, long-lasting finish. This will make your project stand out.
How Weather and Environmental Conditions Affect Primer Performance
Environmental conditions significantly impact primer application success. Weather factors like temperature and humidity influence drying time and adhesion. These elements are critical for a durable paint job.
Temperature Considerations
Temperature is key in primer application. Primers perform best in temperatures between 60°F and 90°F. Extreme temperatures can alter drying times and adhesion. High temperatures can cause the primer to dry too fast, compromising adhesion.
Humidity Factors
Humidity also plays a significant role. High humidity slows primer drying, while low humidity speeds it up. It’s vital to select a primer suitable for your area’s humidity to ensure proper adhesion.
Ventilation Requirements
Ventilation is crucial for primer application. It removes moisture and fumes, ensuring proper drying and adhesion. Good ventilation also prevents mold and mildew growth.
Considering these environmental factors ensures a successful primer application. This leads to a long-lasting paint job with excellent adhesion.
The Cost Factor: Primer vs. Extra Paint Coats
Deciding between using a primer or applying extra paint coats is a crucial financial decision in painting projects. The choice significantly affects the project’s overall cost. A primer necessity is key in determining the best strategy. It lays a strong paint foundation that endures for years.
While a primer may seem more expensive at first, it can lead to long-term savings. Several factors come into play:
- Reduced paint consumption: A primer enhances paint adhesion, reducing the amount needed.
- Extended paint lifespan: A solid foundation prolongs paint durability, minimizing touch-ups.
- Lower maintenance costs: A primed surface is easier to maintain, cutting down on repair expenses.
Long-term Savings Analysis
An in-depth cost analysis is essential for making a wise choice. Consider the primer, paint, and potential long-term savings costs.
Material Cost Comparison
Here’s a breakdown of material costs:
| Material | Cost |
|---|---|
| Primer | $20-$50 per gallon |
| Paint | $30-$70 per gallon |
| Extra paint coats | $50-$100 per coat |
Conclusion: Making the Right Decision for Your Paint Project
Understanding the role of paint primer is key to achieving top-notch results in your painting projects. Whether you’re starting fresh or updating an existing surface, choosing to use primer is vital. It significantly impacts the paint’s long-term performance and durability.
Knowing the different primer types and their uses helps you pick the best one for your project. While skipping primer might seem like a quick fix, it can lead to more costly and time-consuming repairs later on.
As you prepare for your next painting project, let the knowledge from this guide inform your decisions about primer use. With the correct primer application and attention to detail, you’ll achieve a flawless, lasting finish. This will not only impress your neighbors but also enhance your home’s value.