Transforming your home’s look with a fresh paint job is a game-changer. Yet, a solid foundation is necessary before you can paint. This is where wall repair comes into play. It’s vital for a smooth finish, addressing cracks, holes, or water damage.
We aim to equip you with the tools and methods for successful wall repair. From initial preparation to the final touches, we’ve got you covered. With the right approach and materials, your damaged walls can be restored. This is crucial for a successful painting project.
Key Takeaways
- Wall repair is essential before painting
- Proper surface preparation is crucial for a flawless finish
- Wall repair can help revive damaged walls
- Surface preparation is a critical step in the painting process
- With the right techniques and materials, you can achieve professional-looking results
- Wall repair and surface preparation can help extend the life of your walls
Understanding Common Wall Damage Types
Understanding the types of wall damage is key for effective repair. Different damages need unique solutions. Knowing these differences can save time and effort.
Common wall damage includes surface cracks, hairline fractures, holes, punctures, and water damage. Each damage type presents its own set of challenges. For example, surface cracks and hairline fractures can be fixed with simple drywall techniques. Holes and punctures, on the other hand, may need more detailed patching.
Key considerations for wall repair include:
- Assessing damage extent to choose the best repair method
- Selecting the right materials and tools, like joint compound and sandpaper
- Preparing the surface for a smooth and lasting fix
By understanding common wall damage and using a thoughtful repair approach, homeowners can achieve professional results. This leads to a more beautiful and durable living space.
Whether facing a small scratch or a large hole, the right skills and knowledge are crucial. With the right techniques and materials, you can confidently tackle any drywall repair or hole patching project.
| Type of Damage | Repair Approach |
|---|---|
| Surface Cracks and Hairline Fractures | Drywall repair with joint compound and sandpaper |
| Holes and Punctures | Hole patching with drywall patches and joint compound |
| Water Damage and Stains | Specialized techniques and materials, such as water-resistant paint and sealants |
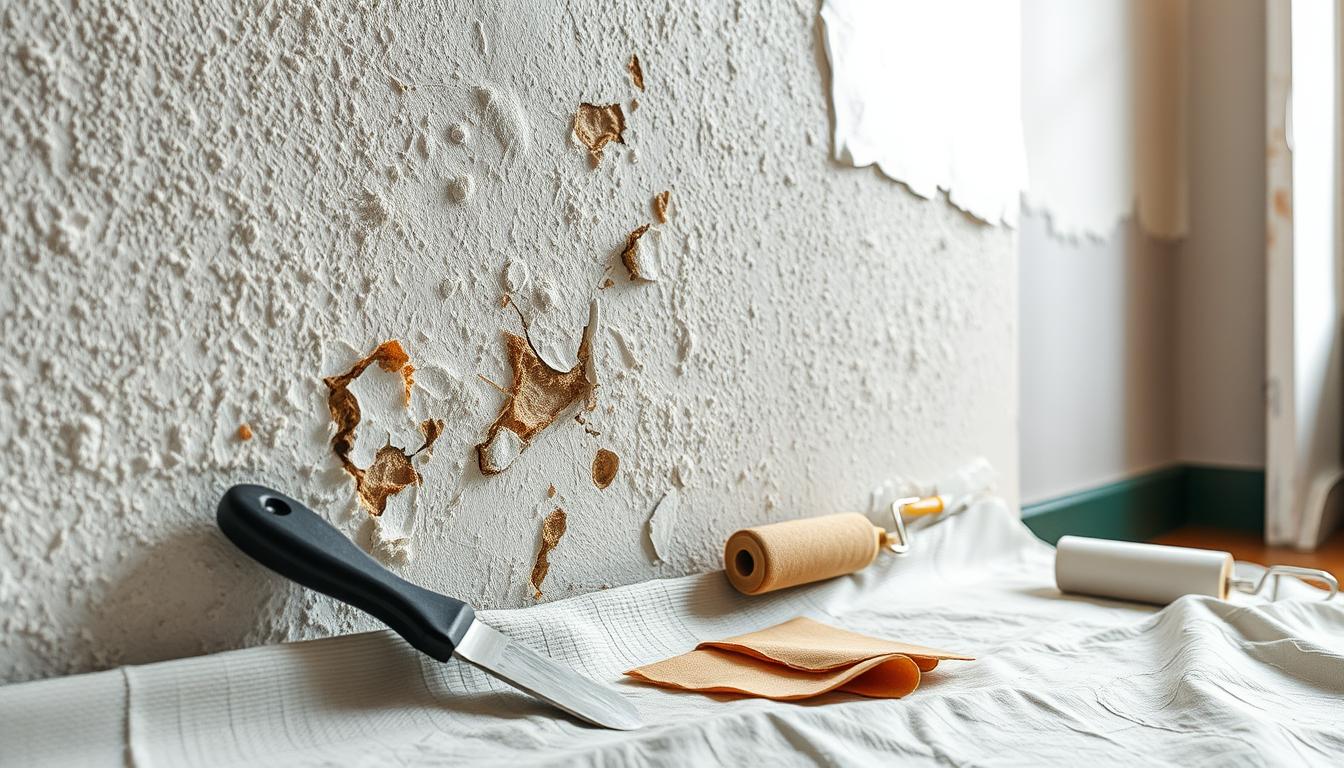
Essential Tools and Materials for Wall Repair
To achieve professional-looking results, it’s crucial to have the right tools and materials for the job. When it comes to repair techniques, having a well-stocked toolkit can make all the difference. From putty knives and sandpaper to joint compound and paint, the right tools will help you get the job done efficiently.
A successful wall fixes project requires attention to detail and the right materials. Here are some essential items to include in your toolkit:
- Putty knives for applying and smoothing joint compound
- Sandpaper for smoothing out surfaces
- Joint compound for filling holes and cracks
- Paint for finishing touches
When choosing materials for your wall repair project, consider the type of damage you’re dealing with and the desired outcome. For example, if you’re working with drywall, you’ll need to use a joint compound designed for drywall repair techniques. By selecting the right materials and tools, you’ll be able to achieve professional-looking results and ensure a successful wall fixes project.
Remember, the key to a successful wall repair project is to take your time and work methodically. With the right tools and materials, you’ll be able to achieve professional-looking results and enjoy a beautifully repaired wall for years to come.
Professional Wall Repair Techniques for Lasting Results
To achieve smooth walls, mastering professional wall repair techniques is crucial. This involves patching large holes, filling deep cracks, and addressing corner damage. By following these steps, you’ll create a seamless surface perfect for painting.
Crack filling requires the right materials and tools. Essential items include a high-quality filler and a putty knife. Begin by cleaning the area around the crack. Then, apply the filler and smooth it out with the putty knife. Once dry, sand it down to a smooth finish.
For more extensive damage, such as large holes or corner damage, a combination of materials is needed. This includes joint compound and mesh patches. Here’s how to proceed:
- Clean the area around the damage
- Apply a layer of joint compound
- Press the mesh patch into place
- Apply additional layers of joint compound, allowing each layer to dry before sanding
By employing these professional wall repair techniques, you can achieve smooth walls without cracks or damage. Always use high-quality materials and tools. Take your time with each repair. With practice and patience, you’ll master wall repair in no time.
| Repair Technique | Materials Needed | Difficulty Level |
|---|---|---|
| Crack Filling | Filler, putty knife | Easy |
| Patching Large Holes | Joint compound, mesh patches | Medium |
| Addressing Corner Damage | Joint compound, mesh patches | Hard |
Surface Assessment and Preparation Steps
Before embarking on any wall repair project, a thorough surface assessment and preparation are crucial. This step involves cleaning the area, removing debris or old paint, and ensuring it’s dry and dust-free. A well-prepared surface is essential for a smooth and durable finish.
Start by examining the wall for cracks, holes, or water damage. Note the areas needing repair and gather cleaning solutions and materials. Use a mild cleaner to remove dirt, grime, or old paint. This step is vital for a strong bond between the repair material and the wall.
Then, use a putty knife or sandpaper to remove loose debris or rough spots. This step ensures a smooth surface for the repair material to adhere to. After cleaning and smoothing the surface, apply a primer if needed. This enhances the bond between the repair material and the wall, resulting in a uniform finish.
- Clean the surface with a gentle cleaner
- Remove any loose debris or rough spots
- Apply a primer, if necessary
By adhering to these surface preparation steps, you’ll ensure a robust and enduring wall repair. Remember to be meticulous and patient. A well-prepared surface is the cornerstone of a successful repair project.
| Step | Description |
|---|---|
| 1 | Inspect the wall for any damage |
| 2 | Clean the surface with a gentle cleaner |
| 3 | Remove any loose debris or rough spots |
Dealing with Different Wall Materials
The type of wall material is key when it comes to repair. Each material has its own set of challenges and needs specific techniques and materials. For instance, drywall repair often involves hole patching, which can be tricky if not done right.
In this section, we’ll dive into the techniques and materials needed for drywall, plaster, and concrete surfaces. We’ll discuss the unique challenges of each and provide the knowledge to tackle repairs confidently. Whether it’s patching holes in drywall or treating concrete, we’ve got you covered.
Drywall Specific Repairs
Drywall repair is a common issue for homeowners. It demands the right materials and techniques for a smooth, durable finish. Key considerations include:
- Choosing the correct joint compound
- Applying the right pressure when sanding
- Ensuring enough drying time for the compound
Plaster Wall Solutions
Plaster walls need a different approach. Being more brittle than drywall, they’re prone to cracking. Repairing plaster walls requires the right plaster and proper application to avoid further damage.
Concrete Surface Treatment
Concrete surfaces are durable but sometimes need repair. Treatment involves cleaning and preparing the surface before applying a new layer or coating. This helps extend the concrete’s life and prevent further damage.
Understanding each wall material’s unique characteristics ensures your repairs are done right and last long. Whether it’s drywall, plaster, or concrete, the right techniques and materials are crucial for a professional finish.
| Wall Material | Repair Technique | Materials Needed |
|---|---|---|
| Drywall | Hole patching | Joint compound, sandpaper, paint |
| Plaster | Crack filling | Plaster, water, trowel |
| Concrete | Surface treatment | Concrete, coating, cleaning solution |
Moisture Prevention and Treatment
Moisture poses a significant challenge in wall repair. To overcome this, employing effective repair techniques and wall fixes that prevent moisture damage is crucial. Utilizing moisture-resistant materials, such as waterproof coatings and sealants, is a key strategy to protect your walls from moisture.
Ensuring good ventilation in the area is another vital step in preventing moisture damage. Implementing ventilation systems that reduce humidity and prevent moisture buildup is essential. These measures help safeguard your walls from moisture damage, ensuring a successful repair.
To further enhance your repair techniques, consider the following tips:
- Use a dehumidifier to reduce moisture levels in the area
- Ensure good airflow by opening windows and doors
- Use a moisture-resistant paint or coating to protect your walls
By following these tips and using effective repair techniques and wall fixes, you can prevent moisture damage and achieve a successful wall repair. Always opt for high-quality materials and adhere to proper ventilation procedures for the best outcomes.
Advanced Repair Methods for Textured Walls
Textured walls pose a significant challenge when aiming for a smooth finish. Understanding the role of crack filling and surface preparation is crucial. These steps are essential for achieving a seamless finish that harmonizes with the surrounding area.
Repairing textured walls involves two main strategies: matching existing textures and introducing new patterns. Both methods demand a thorough understanding of the wall’s surface and the materials used in its texture.
Matching Existing Textures
To replicate existing textures, one must analyze the pattern and depth of the texture. This involves examining the wall’s surface to identify the texture type. Common textures include:
- Orange peel texture
- Knockdown texture
- Popcorn texture
Creating New Texture Patterns
Introducing new texture patterns is more complex but offers greater flexibility and creativity. Various materials, like joint compound or texture sprays, can be used to craft unique designs. It’s vital to test the texture on a small area first to ensure a flawless finish.
By employing these advanced repair techniques and selecting the appropriate materials, you can achieve professional-grade results. This will result in smooth walls devoid of cracks and imperfections.
| Texture Type | Description |
|---|---|
| Orange Peel | A textured finish that resembles the skin of an orange |
| Knockdown | A textured finish that is created by knocking down a layer of joint compound |
| Popcorn | A textured finish that is created by spraying a mixture of water and starch onto the wall |
Sanding and Smoothing Techniques
When it comes to surface preparation for painting, sanding and smoothing are crucial steps in the wall repair process. To achieve a flawless finish, it’s essential to use the right techniques and equipment.
Proper Sanding Equipment
The right sanding equipment can make all the difference in achieving professional results. Some essential tools include:
- Sandpaper with varying grit levels
- A sanding block for flat surfaces
- A dust mask for protecting yourself from dust and debris
Achieving Professional Results
To achieve professional results, it’s essential to feather edges and smooth out surfaces. This can be done by using a sanding block and gradually increasing the grit level of the sandpaper. Remember to work in a well-ventilated area and wear a dust mask to protect yourself from dust and debris.
By following these tips and using the right equipment, you can achieve a smooth and even finish that’s ready for painting. Whether you’re a DIY enthusiast or a professional contractor, proper sanding and smoothing techniques are essential for a successful wall repair project.
Priming Repaired Areas
When it comes to drywall repair, priming the repaired areas is crucial. It ensures a strong bond between the repair material and the paint. This step is often overlooked but is essential for a professional-looking finish. For hole patching, priming creates a smooth surface, allowing paint to adhere evenly.
To choose the right primer, consider the type of repair. For drywall repairs, a primer designed for drywall is best. Popular options include Zinsser and Benjamin Moore.
Using a high-quality primer offers several benefits:
* It creates a strong bond between the repair material and the paint.
* It prevents peeling and flaking.
* It ensures a smooth, even finish.
* It can help hide minor imperfections in the repair.
By following these tips and using the right primer, you can achieve a professional-looking finish. This will last for years to come.
| Primer Type | Best For |
|---|---|
| Drywall Primer | Drywall repair, hole patching |
| Latex Primer | General-purpose repairs, interior painting |
Special Considerations for High-Traffic Areas
High-traffic areas require special attention when it comes to wall repair. These spaces face constant wear and tear. To achieve a lasting repair, you must employ repair techniques and materials designed for such conditions. Reinforced materials, like fiberglass mesh, can significantly enhance the repair’s strength.
Applying durable coatings is also vital to protect the repair from future damage. Opt for high-quality primers and paints, tailored for high-traffic zones. These measures ensure your wall fixes remain intact for years, even in the most frequented areas.
Reinforcement Methods
- Using fiberglass mesh to add strength to the repair
- Applying a layer of joint compound to smooth out the surface
- Installing a durable coating, such as a clear epoxy, to protect the repair
Durability Solutions
Enhancing the repair’s durability is crucial. Consider using textured coatings or scratch-resistant paints. These can shield the repair from scratches, scuffs, and other damage common in high-traffic zones.
By adhering to these guidelines and selecting the appropriate materials and repair techniques, you can craft a repair that endures. Always prioritize high-quality materials and adhere to the manufacturer’s guidelines for application and drying times. This will guarantee a professional finish.
Time-Saving Tips from Professional Contractors
Efficiency is key when tackling wall repair tasks. Professional contractors offer valuable insights to streamline your efforts. They emphasize the importance of distinguishing between quick fixes and lasting solutions. For example, crack filling might offer a temporary solution but may not last.
Quick Fixes vs. Long-Term Solutions
Quick fixes might seem appealing but can often lead to more issues. In contrast, dedicating time to achieve smooth walls can yield long-term benefits. Here are some tips to guide your decision:
- Assess the damage: Determine the extent of the damage to decide whether a quick fix or a long-term solution is necessary.
- Choose the right materials: Select materials that are suitable for the task, such as spackling compound for crack filling.
- Follow best practices: Apply best practices, like sanding and priming, to ensure a professional finish.
When to Call a Professional
While DIY repairs can save money, there are times when professional help is necessary. Extensive damage or uncertainty about the best approach often calls for a contractor. They bring expertise and ensure the job is done right.
Conclusion
Repairing damaged walls demands a careful, step-by-step approach. This guide has given you the crucial knowledge and expert techniques for tackling tough surface preparation and wall repair tasks. You now know how to fix cracks, holes, and moisture issues, transforming your walls and enhancing your home’s beauty.
Patience and detail are essential for lasting, professional results. By using the advice in this article, you can confidently handle any wall repair, from minor fixes to major restorations. With the right materials, tools, and methods, you’ll achieve a flawless, seamless finish that will impress everyone.
So, get ready, gather your tools, and start your next wall repair project. With the knowledge you’ve acquired, you’re ready for success. Happy repairing!