Hanging shelves or frames can be tricky, but the right tools make all the difference. Tools for layout and measuring help ensure your shelves are level and secure. This way, you avoid crooked pictures or wobbly storage.
This guide breaks down simple steps to help you plan and install items confidently. Whether you’re organizing a home office or decorating a living room, you can do it right.
Key Takeaways
- Layout tools guide the placement of shelves and frames for balanced results.
- Accurate measurements with tape measures and levels eliminate guesswork.
- Planning reduces mistakes when installing hanging shelves or wall decor.
- Basic tools like spirit levels and stud finders guarantee secure mounting.
- Follow clear steps to achieve professional-looking results without frustration.
Planning Your Project with Layout Tools
Before you start drilling, pick the right layout tools. They make your project easier, from choosing tools to marking spots. Let’s see how to pick and use them well.
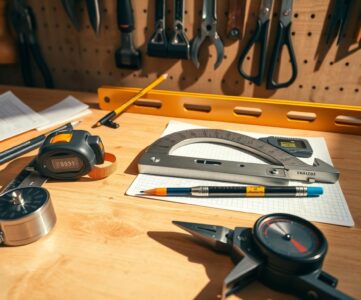
Identifying the Right Layout Tools
Not every project needs the same tools. Here are the basics:
| Tool | Use Case | Key Features |
|---|---|---|
| Laser Level | Align shelves or frames | Projects precise horizontal/vertical lines |
| Tape Measure | Measure wall spaces | Reinforced tape for durability |
| Spirit Level | Check surface flatness | Easy-to-read bubble vial |
Measuring Dimensions and Marking Your Space
Here’s how to avoid mistakes:
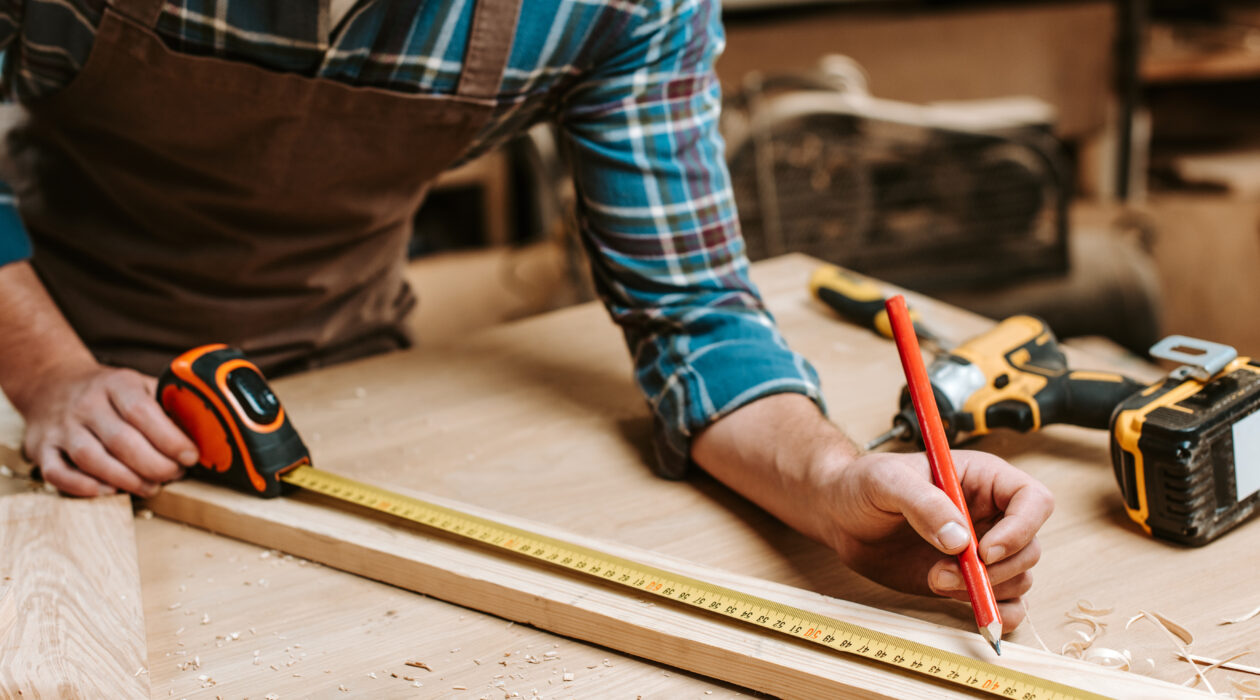
- Measure wall width and height with a tape measure twice.
- Use a laser level to mark central points for symmetry.
- Sketch a rough layout on paper or a digital app.
- Test spacing by taping outlines to the wall.
Always double-check your measurements before drilling. A small mistake can save a lot of time later. Remember, tools like spirit levels check if surfaces are even. Take your time—perfect planning means perfect results!
Mastering Measuring Tools for Precise Placement
Getting the right measurements is key to perfect Hanging Shelves. Start by picking the best tools to avoid mistakes. We’ll look at the top tools and how to use them right.
Understanding Different Measuring Tools
There are tools for every need:
- Tape measures: Steel or cloth tapes for wall dimensions
- Laser levels: Project lines to align shelf brackets
- Spirit levels: Check horizontal/vertical alignment
- Stud finders: Locate wall studs for secure mounting
Techniques for Accurate Measurements
Follow these steps for consistent results:
- Measure twice, mark once to prevent errors
- Use a laser level to extend lines beyond the shelf area
- Check wall depth before drilling to avoid wires
- Overlap brackets by 1/4 inch for stability
Small details make a big difference. Practice with tools before big Hanging Shelves projects. This builds confidence. Precision ensures your walls look great and are safe.
Essential Setup for Hanging Shelves and Frames
Before you start, get your workspace ready. You’ll need layout tools like levels, measuring tapes, and drill kits. Also, have screws, anchors, and hardware ready to go.
- Check battery life in drills and laser levels.
- Clear floor space for moving ladders and materials.
- Wear safety goggles and use a sturdy step stool or ladder.
- Test drill bits and saws to ensure they’re sharp and functional.
Put tools where you can easily reach them but not in the way. Use a magnetic tray for screws. For heavy items, find wall studs first with a stud finder. Place your layout tools close to the work area for easy adjustments. Remember, you can tape level lines on walls to check alignment before drilling.
Always put safety first. Check walls for wires with a voltage detector. Always test anchor points in drywall. A clean, organized setup helps you avoid mistakes. Keep a cloth handy to wipe away dust and keep surfaces clear for precise tool use.
Tips for Effective Layout and Design
Make spaces better by mixing style with usefulness when setting up Hanging Shelves. Small changes can make walls stand out as much as they serve a purpose.
Balancing Aesthetics with Functionality
Begin with flow in mind. Put heavy items like books on lower shelves to stabilize the area. Mix up vertical and horizontal shelves for depth. In small rooms, opt for thin brackets to avoid mess.
- Use neutral tones for shelves to keep decor adaptable
- Group items by theme or color for cohesive displays
- Leave 1–2 inches between items to prevent overcrowding
Integrating Layout Tools into Your Decor
Make hardware a design feature with decorative brackets from Zinus or IKEA. Use grid templates for symmetrical layouts, then cover tape marks with wall decals. For uneven styles, balance a big shelf with smaller items.
Try angled setups to highlight windows or fireplaces. Adjustable brackets let you adjust spacing without harming walls. Remember, function should guide but not limit your creativity!
Troubleshooting and Adjustments
Mistakes can happen, even with careful prep. Layout tools help fix issues. Let’s tackle common problems and solutions.
Common Measurement Errors and How to Fix Them
Small mistakes can cause big problems. Here’s how to spot and fix them:
- Uneven lines: Use a laser level to redraw guidelines. Double-check with a tape measure.
- Off-center hangs: Mark center points again with a pencil and spirit level. Adjust brackets or screws slowly.
- Wall type mix-ups: Confirm wall type with a stud finder. Swap anchors to match drywall, plaster, or brick.
Overcoming Installation Challenges
Stumbling blocks like crooked frames or wobbly shelves? Try these steps:
- Loose anchors? Reinforce with heavier duty screws or toggle bolts.
- Uneven walls? Use shims to fill gaps before securing items.
- Heavy items? Spread weight with L-brackets or multi-stud mounting.
Take your time and test each step. Layout tools make fixes easier. A second set of eyes helps spot issues early. Celebrate small wins—every adjustment gets you closer to a perfect result!
Conclusion
With the right tools and techniques, hanging shelves or frames is easy. Planning, measuring, and making smart adjustments make complex projects simple. Tools help set up, and accurate measurements avoid mistakes, leading to strong results.
Whether it’s art displays or storage, trust the steps you’ve learned. Begin by marking spots correctly and using strong brackets for shelves. Let your creativity shine while using proven methods for safety. Testing small areas boosts confidence, and quick fixes solve minor problems.
Don’t let doubt stop you. You’re ready to make spaces that are both useful and stylish. Take it one step at a time, and see your ideas become real. Your walls are ready!