Welcome to our guide on DIY tool station projects. We’ll show you how to build the perfect work area for your tools and projects. A well-organized tool station boosts efficiency and productivity. With the right plans and projects, you can create a functional workspace that suits your needs.
Whether you’re a seasoned DIY enthusiast or just starting, a well-designed tool station is key. It helps you stay organized and focused. By using effective workbench plans and tool storage projects, you can make the most of your space.
With a bit of planning and creativity, you can build a tool station that’s both functional and efficient. By thinking about your specific needs and using the right plans and projects, you can create a workspace that makes your work easier.
Introduction to DIY Tool Stations
In this guide, we’ll dive into the importance of workbench plans and tool storage projects for a functional workspace. We’ll share tips and ideas for building a tool station that meets your needs. This will help you stay organized and productive.
Key Takeaways
- Effective workbench plans are essential for a functional tool station
- Tool storage projects can help maximize your workspace
- A well-designed tool station can improve efficiency and productivity
- Considering your specific needs is crucial when building a tool station
- Workbench plans and tool storage projects can be customized to meet your needs
- A functional tool station can help you work smarter, not harder
Planning Your Ultimate Tool Station Layout
Creating an efficient workspace starts with planning your tool station layout. A well-designed layout maximizes space, reduces clutter, and makes work easier and more enjoyable. It’s key to think about your workshop organization and custom workstation needs.
Start by assessing your available space and tool storage needs. This helps decide the best layout for your tool station. Think about the tools you use most and how much space they need. Also, consider your workflow to make it more efficient.
Assessing Your Available Space
Measure your workshop’s dimensions and note any obstacles like doors or windows. Use a tape measure or laser to get accurate measurements. Remember to consider your ceiling height and vertical storage space.
Determining Your Tool Storage Needs
Make a list of your tools, categorizing them by type. This helps choose the right storage for each tool category.
Creating a Workflow Diagram
Draw a basic floor plan of your workshop, including your tool station. Use symbols or icons for tools and arrows for workflow. This visualizes your layout and highlights areas for improvement.
By following these steps, you can design a tool station layout that suits your needs. Consider your space, tool storage, and workflow. With planning and creativity, you’ll have a workspace that’s efficient, productive, and enjoyable.
| Tool Category | Storage Solution |
|---|---|
| Hand Tools | Toolbox or pegboard |
| Power Tools | Shelving or cabinet |
| Equipment | Workbench or floor-standing storage |
Essential Materials and Tools for Construction
To build a functional tool bench, you’ll need the right materials and tools. A well-planned workshop setup is key for a successful DIY project. Think about the tools you’ll use and the space for your tool bench.
You’ll need lumber for the frame, plywood or medium-density fiberboard for the work surface, and hardware like screws and nails. Don’t forget a circular saw, drill press, and hand tools like hammers and tape measures.
A typical tool bench has several parts:
- Work surface
- Storage compartments
- Shelving units
- Vice and clamp system
When setting up your workshop, think about the workflow and efficiency of your tool bench. A well-organized tool bench keeps you focused and saves time. Also, consider the overall workshop setup, including lighting, ventilation, and electrical outlets.
With the right materials and tools, you can make a functional and efficient tool bench. This will help you stay organized and focused, making it easier to complete your DIY projects.
| Material | Tool | Purpose |
|---|---|---|
| Lumber | Circular saw | Frame construction |
| Plywood | Drill press | Work surface creation |
| Hardware | Hand tools | Assembly and installation |
Building Your Custom Tool Station Foundation
A solid foundation is key for a functional workspace. Storage solutions and workbench plans help you design a custom tool station. This meets your needs and boosts your productivity.
A well-planned foundation is vital for a stable tool station. You need to pick the right work surface, install support structures, and add reinforcement points. This makes sure your tool station can handle the weight and stress of daily use.
Selecting the Right Work Surface
The work surface is crucial for your tool station. It should be tough, resistant to scratches and spills, and simple to clean. You can choose from wooden, metal, or plastic surfaces. Think about your needs and preferences when picking a surface. Also, add storage solutions to keep your tools and materials organized.
Installing Support Structures
Support structures, like legs, shelves, and cabinets, form the base of your tool station. They must be strong, adjustable, and simple to put together. Look for storage solutions that fit into your support structures, like drawers, bins, and hooks. This maximizes your space and keeps tools handy.
Adding Reinforcement Points
Reinforcement points, such as brackets and screws, add stability and support to your tool station. They should be placed to spread the weight evenly and prevent collapse. By using storage solutions and workbench plans in your design, you create a strong and useful tool station that lasts.
| Component | Description |
|---|---|
| Work Surface | Durable, resistant to scratches and spills, and easy to clean |
| Support Structures | Sturdy, adjustable, and easy to assemble |
| Reinforcement Points | Strategically placed to distribute weight evenly and prevent collapse |
Designing the Perfect Workbench Height and Size
When it comes to tool storage projects, a well-designed workbench is key for a custom workstation. The height and size of your workbench affect your comfort and work efficiency. Think about the tasks you’ll do and the tools you’ll use to find the perfect height.
The average workbench height is between 28 and 30 inches. But, it can change based on your needs and the tools you’ll use. For example, if you work with big power tools, a taller workbench might be better.
When designing your workbench, think about the size of the surface area too. A bigger surface gives more room for tools and materials. But, it might make the workbench harder to move around. Aim for a size that fits your needs but still lets you move easily.
Some important things to think about when designing your workbench include:
- Tool storage and organization
- Work surface area and material
- Height and adjustability
- Lighting and electrical outlets
By considering these factors, you can make a workbench that suits your needs. This will improve your custom workstation experience.
A well-designed workbench is the heart of a functional workshop. By thinking about your needs and preferences, you can make a workbench that makes working easier and more comfortable.
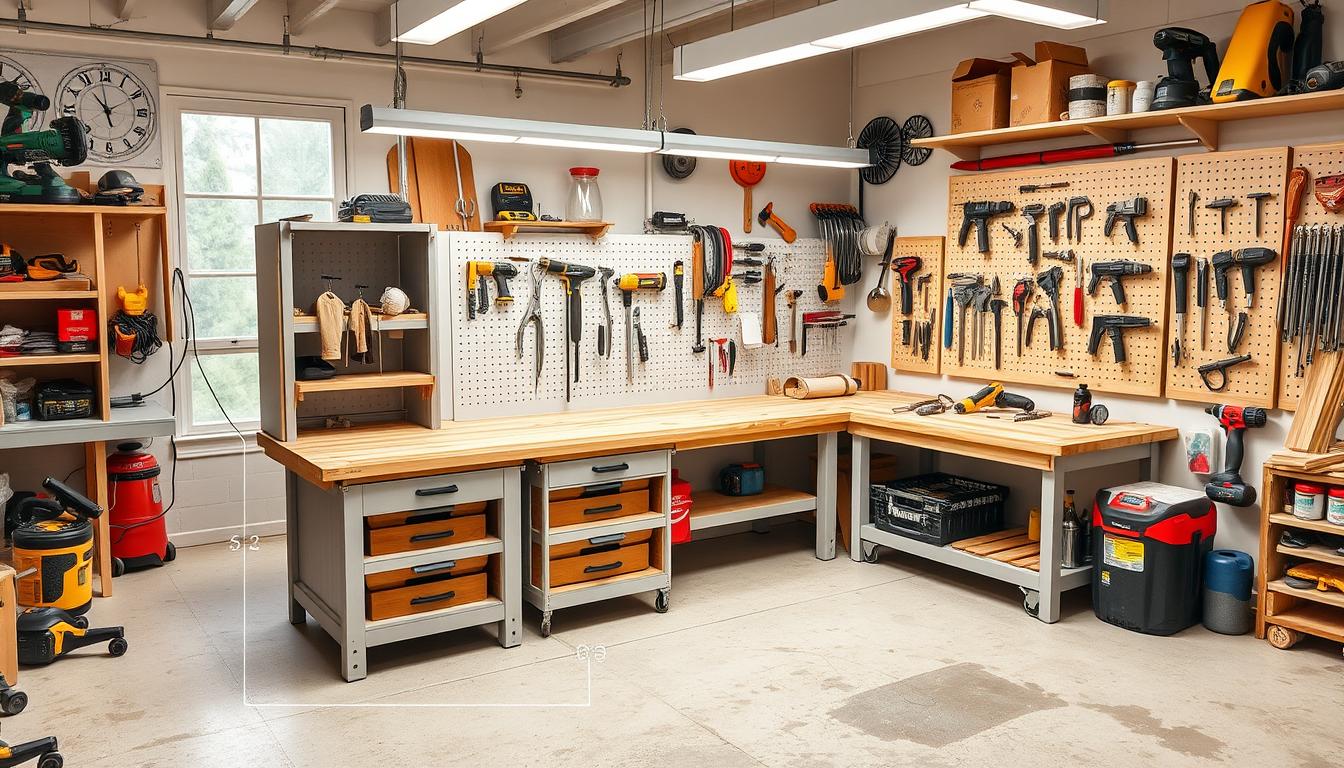
Professional Tool Station Storage Solutions
Storage solutions are key to a tidy workshop. They help keep things organized, boosting productivity and cutting down on waste. With the right storage, tools and materials are easy to find, making your work flow better.
A good tool station has many storage types. You can find wall-mounted systems, drawers, and mobile units. Each type has its own benefits, like saving space or making tools easy to grab.
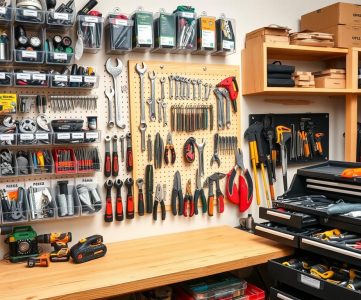
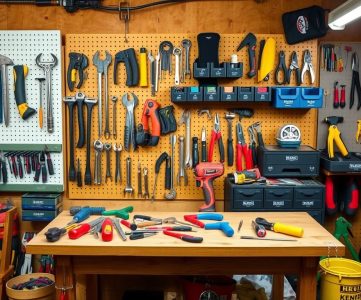
Wall-Mounted Organization Systems
Wall systems are great for tools you use a lot. They save floor space and let you reach tools quickly. You can choose from pegboards to slatwall panels to fit your needs.
Drawer Configuration Options
Drawers are flexible and keep things organized. They fit all sorts of tools and materials. You can customize them to fit your storage needs perfectly.
Mobile Storage Units
Mobile units are handy for moving tools around. They come with drawers, shelves, or cabinets. This lets you change your storage setup as needed.
Adding these storage options to your workshop makes it more efficient. Think about what you need and choose storage that fits your workflow.
| Storage Solution | Benefits |
|---|---|
| Wall-Mounted Organization Systems | Maximizes vertical space, easy access to tools |
| Drawer Configuration Options | Compact storage, customizable, easy to access |
| Mobile Storage Units | Flexible, movable, versatile storage options |
Power Tool Integration and Safety Features
Setting up your tool bench and workshop is all about power tools and safety. A good workshop setup reduces risks and keeps you safe. You need to plan where to put electrical outlets, install dust collection, and have emergency shutdowns.
Electrical outlets are key for power tool safety. They should be far from water and flammable stuff. Here are some tips for outlet placement:
- Put outlets away from water and flammable stuff
- Use GFCI outlets to avoid electrical shock
- Make sure outlets are not blocked by other things
Dust collection systems are also important for safety. They keep dust out of the air, which is good for your lungs and your eyes. Choose a system that fits your workshop and tools.
Emergency shutdowns are crucial for safety. They let you stop power tools fast in an emergency. This prevents injuries and damage. Here are some common shutdown solutions:
| Shutdown Solution | Description |
|---|---|
| Emergency Stop Button | A button that can be pressed to quickly shut down power tools |
| Air Compressor Shutdown Valve | A valve that can be used to shut down air compressors and other pneumatic equipment |
| Power Tool Kill Switch | A switch that can be used to shut down individual power tools |
Adding these safety features and power tool strategies to your setup makes your workshop safe and efficient. It meets your needs and helps you reach your goals.
Maximizing Vertical Storage Space
To make your tool station efficient, focus on using vertical space. Include shelving, cabinets, and drawers in your workbench plans. This way, you can store more tools and materials, keeping your area tidy.
Think about the tools and materials you need to store. Use wall-mounted systems for tools you use often. Store less used items in cabinets or on high shelves. This maximizes your vertical space and keeps your area functional.
Here are some tips for better vertical space in workshops:
- Install pegboards or slatwall panels to hang tools and accessories
- Use stackable containers or bins for small parts and materials
- Set up a labeling system to find stored items easily
By using these tips, you can make your tool station more organized. Remember to tailor your tool storage to your needs and workbench plans. Be creative with your vertical storage solutions.
Maximizing vertical storage space is a great way to keep your tool station organized and clutter-free. With the right workbench plans and tool storage projects, you can have a functional and efficient workspace.
Lighting and Visibility Optimization
Good lighting is key for a comfy and efficient workspace. It helps reduce eye strain and boosts visibility. A well-thought-out workshop setup should also think about lighting needs.
For better lighting, add task lights in areas for specific tasks. Think about under-cabinet lights, desk lamps, or pendant lights. Natural light integration is also vital. It cuts down on artificial light and makes work more enjoyable.
Task Lighting Installation
Choose the right task lighting for your tasks. For example, if you work with small parts, pick lights with a high color rendering index (CRI). This improves visibility.
Natural Light Integration
Bring in natural light with skylights, big windows, or solar tubes. It lessens the need for artificial light and makes your space nicer.
Shadow-Free Work Areas
For areas without shadows, mix task lights with natural light. Use light-colored surfaces and finishes to bounce light and cut shadows.
Optimizing lighting and visibility in your custom workstation and workshop setup improves your work life. Think about your specific needs and choose lighting that fits your tasks and activities.
Workshop Comfort and Ergonomics
A good workshop is more than just tools and storage solutions. It’s about being comfortable and ergonomic. This is key for your health, well-being, and how well you work. Think about anti-fatigue flooring, tool reach zones, and keeping the climate right.
Anti-fatigue flooring, like rubber mats, can make standing less tiring. Tool reach zones help you avoid stretching and bending, which lowers injury risk. Keeping the workshop cool and well-ventilated also makes it more comfortable.
- Using ergonomic tools and equipment
- Creating a well-organized and clutter-free workspace
- Implementing adequate lighting and ventilation
- Investing in anti-fatigue flooring and seating options
Focus on comfort and ergonomics in your workshop. This will help your physical and mental health, and boost your work efficiency. Don’t forget about your storage solutions and tool bench. They play a big role in your comfort and ergonomics.
| Workshop Comfort Considerations | Importance |
|---|---|
| Anti-fatigue flooring | High |
| Tool reach zones | Medium |
| Climate control | High |
Conclusion: Creating Your Dream Workshop Space
Creating your perfect tool station and workshop needs careful planning. By following this guide, you can make your vision come true. You’ll get a space that’s both functional and reflects your style.
Every step, from measuring your space to choosing the right tools, matters. It’s all about finding the right mix of practicality and creativity. This way, your workshop will meet your needs and show off your personality.
With the right tools and a good plan, you can make your workshop dreams real. It will be a place that boosts your productivity and pride. So, start the journey, be creative, and enjoy making your ultimate workshop.