Welcome to our guide on switch installation and replacement. We’ll cover various switch types and electrical switches to help you with your project. Whether you’re a DIY enthusiast or a beginner, this guide will walk you through the process with ease.
Understanding the different switch types and electrical switches is crucial for a successful installation. We’ll provide you with step-by-step instructions and safety precautions to ensure a smooth process.
Our goal is to provide you with a comprehensive guide that covers everything you need to know about switch installation and replacement. This includes information on switch types and electrical switches.
Key Takeaways
- Understanding switch types is essential for a successful installation
- Electrical switches come in various types, each with its own unique features
- Safety precautions are crucial when working with electrical switches
- A comprehensive guide can help you navigate the installation process with ease
- Switch installation and replacement can be a DIY project with the right guidance
- Knowing the different electrical switches and switch types can help you make informed decisions
Understanding Basic Electrical Safety
When dealing with electricity, safety is key. Electrical accidents can cause serious harm or even death. Knowing how to handle wire connections and switch installation safely is crucial.
Electrical safety means avoiding electrical shocks, fires, and other dangers. You need safety gear like insulated gloves, safety glasses, and a non-contact voltage tester. Also, knowing local building codes and permits is important, as they can change based on where you are and the project type.
Essential Safety Equipment
Some must-have safety tools for electrical work are:
- Insulated gloves
- Safety glasses
- Non-contact voltage tester
- Fire extinguisher
When to Call a Professional
Some electrical tasks can be DIY, but others need a licensed electrician. If you’re not sure about switch installation or wire connections, it’s safer to call a pro.
Local Building Codes and Permits
Before starting any electrical work, check with local authorities about permits. This is very important for switch installation and wire connections, as they follow specific rules and codes.
By learning about electrical safety and taking the right precautions, you can avoid accidents. Always put safety first and get professional help if you’re not sure about anything.
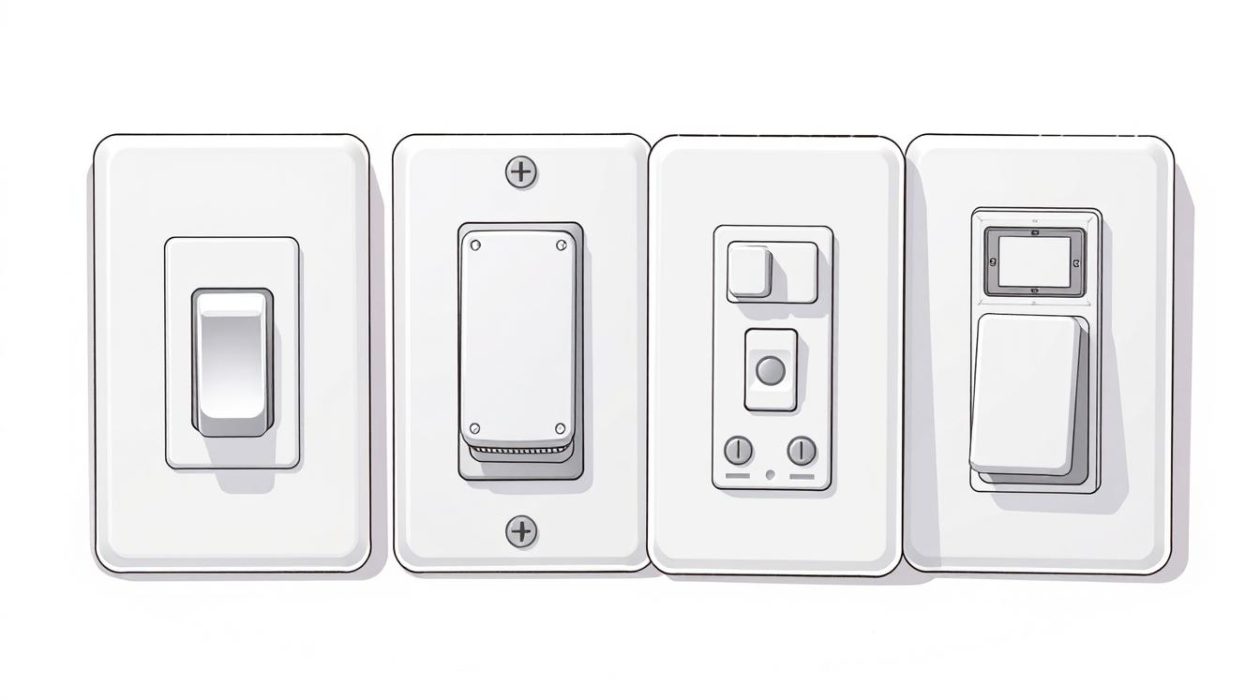
Types of Light Switches Available Today
There are many options for lighting control, like dimmer switches, smart switches, and traditional ones. Each has its own benefits and drawbacks. For example, dimmer switches let you adjust light levels, perfect for living rooms and bedrooms.
Choosing the right light switch is important. Dimmer switches give you precise control over light levels, great for a cozy feel. Smart switches, on the other hand, offer features like scheduling and remote access. They’re perfect for those who want to connect their lights with their smart home devices.
- Dimmer switches: ideal for living rooms and bedrooms
- Smart switches: offer advanced features such as scheduling and remote access
- Traditional switches: simple and cost-effective
When picking a light switch, think about energy efficiency, cost, and how easy it is to use. The right switch can make your home’s lighting convenient and energy-efficient.
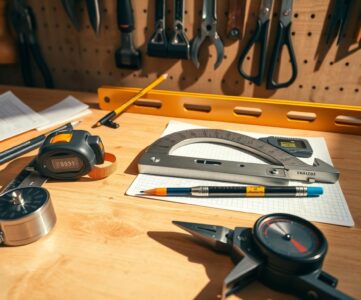
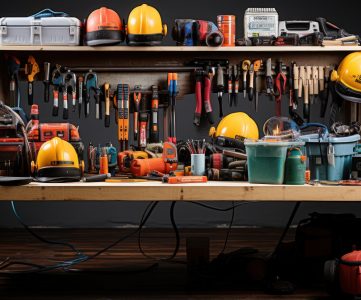
Essential Tools and Materials Needed
To do a light switch installation or replacement right, you need the right tools and materials. This includes the correct switch wiring and electrical switches for your needs. The type of wire and connectors used is key for safety and efficiency in your electrical system.
Choosing the right gauge and type of wire is crucial. It depends on the electrical switches you’re using and your system’s load. Proper wiring helps avoid overheating, electrical shocks, and fires.
For tools, a basic set should have a voltage tester, wire strippers, and a screwdriver. For tougher projects, you might need specialized tools like a wire connector or a switch wiring diagram.
Required Tools Checklist
- Voltage tester
- Wire strippers
- Screwdriver
- Pliers
- Wire connectors
Recommended Materials
When picking electrical switches, think about durability, energy efficiency, and system compatibility. Choose switches that fit your wiring and load well.
| Material | Description |
|---|---|
| Copper wire | High-quality, durable wire for switch wiring |
| Electrical switches | Energy-efficient switches compatible with various switch wiring types |
Preparing for Switch Installation
Choosing the right switch types and lighting control system is key for switch installation. This choice affects your lighting system’s function and efficiency. Think about the lighting you want to control, how many switches you need, and the lighting control level you want.
A good switch types and lighting control system changes your space’s feel and function. You might want dimmer switches for light adjustments or smart switches for remote control. Planning well ensures a smooth installation.
- Turning off the power to the circuit
- Removing the old switch
- Inspecting the wiring
By following these steps and thinking about yourswitch typesandlighting controloptions, you can have a safe and successful installation.
Always follow safety rules and get help from a pro if you’re not sure. With the right planning, you’ll have a lighting system that works well and improves your space.
How to Remove Your Old Light Switch
Removing an old light switch is a key step in the installation process. First, make sure you’ve turned off the power at the main electrical panel. This is a safety step to prevent electrical shocks or injuries.
When you remove the old switch, you’ll find wire connections that need careful handling. It’s important to label these wires for a smooth installation. Use wire markers or labels to mark the different wires and their connections.
- Shut off the power to the switch at the main electrical panel.
- Remove the switch plate and any visible screws holding the switch in place.
- Gently pull the switch out of the wall, taking care not to damage any wire connections.
- Label the wires and take note of their connections to the old switch.
By following these steps and taking the necessary precautions, you can safely remove your old light switch. This prepares you for the new switch installation. Remember to handle wire connections with care, as they are crucial for the electrical circuit.
| Step | Description |
|---|---|
| 1 | Shut off power to the switch |
| 2 | Remove switch plate and screws |
| 3 | Remove old switch and label wires |
Understanding Wire Connections and Circuits
Electrical projects need a good grasp of wire connections and circuits for safety and efficiency. Dimmer switches and switch wiring are key. The right wiring is vital for your system’s performance and life.
Wire types, like copper and aluminum, have their own pluses and minuses. Copper wire conducts better but costs more.
Here are some important points for wire connections and circuits:
- Use the right gauge wire for your project to ensure safe and efficient electrical flow.
- Choose the correct type of switch wiring for your dimmer switches to avoid overheating or electrical shock.
- Consider the benefits and drawbacks of different types of wire and connectors to make informed decisions for your project.
Knowing the basics of wire connections and circuits is crucial for a safe electrical system. Whether installing new dimmer switches or replacing old ones, proper wiring is essential. Always follow local building codes and safety guidelines when working with electrical systems.
| Wire Type | Benefits | Drawbacks |
|---|---|---|
| Copper | High conductivity, durable | Expensive, heavy |
| Aluminum | Lightweight, affordable | Less conductive, prone to corrosion |
Step-by-Step Installation of New Light Switches
Installing a new light switch is easy with the right help. It’s key to pick the right parts for your project. We’ll show you how to install a new light switch, including single pole, three-way, and dimmer switches.
First, gather your tools and materials. You’ll need the new switches and any wiring you need. Knowing about lighting control and electrical switches is also important.
Single Pole Switch Installation
A single pole switch is the most common type. Here’s how to install one:
- Turn off the power at the main electrical panel.
- Remove the old switch and disconnect the wires.
- Connect the new switch to the wires, matching the wire colors.
- Mount the new switch and turn the power back on.
Three-Way Switch Installation
A three-way switch controls a light from two places. The steps are similar to a single pole switch, but with a few extra steps.
Dimmer Switch Installation
A dimmer switch lets you change the light’s brightness. Make sure to pick the right switches and lighting control for your needs.
| Switch Type | Installation Steps |
|---|---|
| Single Pole | Turn off power, remove old switch, connect new switch |
| Three-Way | Turn off power, remove old switch, connect new switch, configure wiring |
| Dimmer | Turn off power, remove old switch, connect new switch, configure dimmer settings |
By following these steps and choosing the right parts, you can install a new light switch. This will improve your home’s lighting control.
Testing Your Newly Installed Switch
After installing your new light switch, it’s important to test it. This makes sure it works right and safely. You need to check the switch types and wire connections to see if they’re secure and working well.
Testing also means doing safety checks. You should make sure all wire connections are tight and not loose. This prevents electrical dangers. Also, make sure the switch is grounded to avoid electrical shock.
Safety Checks
When doing safety checks, follow these steps:
- Turn off the power to the switch at the main electrical panel.
- Use a voltage tester to ensure there is no electricity flowing to the switch.
- Check all wire connections for any signs of wear or damage.
Functionality Testing
After safety checks, test the switch’s function. Turn the power back on and see if the switch works as it should. For different switch types, like dimmer or three-way switches, you might need to do extra tests. This ensures they work right with the wire connections.
By following these steps and understanding switch types and wire connections, you can make sure your new switch is safe and works well. It will serve you reliably for many years.
Troubleshooting Common Installation Problems
Even the most skilled DIY folks can run into issues with switch installation. It’s key to use the right stuff, like dimmer switches that fit your lighting setup.
Common problems include bad wiring, wrong switch setup, and not enough power. To fix these, start by checking the wiring and connections carefully.
- Look for any damage or wear on the wiring
- Make sure the switch is set up right for your lights
- Check if the power supply can handle the lights
By following these steps and using the right dimmer switches, you can solve these problems. This way, you’ll have a successful switch installation.
Remember, safety is the most important thing when dealing with electrical systems. If you’re not sure about anything, it’s best to get a professional electrician.
Maintenance Tips for Your Light Switches
Keeping your light switches in good shape is key for safety and efficiency. Regular cleaning and checks can stop switch failures and electrical shocks. It’s vital to use the right materials and follow the correct installation steps for switch wiring and electrical switches.
To maintain your light switches, start with regular cleaning. Use a soft cloth and mild detergent to clean the switches and around them. This removes dirt and dust that can cause issues. Also, check your switches often for wear and tear, like cracked plates or loose connections.
Regular Cleaning Methods
- Use a soft cloth and mild detergent to clean switches and surrounding areas
- Inspect switches regularly for signs of wear and tear
- Check for loose connections and tighten as needed
When to Replace Switches
If you see signs of switch failure, like flickering lights or warm switches, it’s time for a new one. Replace them if you get frequent electrical shocks or if they’re old. Always use the correct switch wiring and electrical switches for your project.
By following these tips and using the right materials, your light switches will keep working well. Always be careful when working with electrical systems. If you’re unsure, it’s best to get help from a professional.
Conclusion
Installing and replacing light switches can be a fun DIY project. We’ve covered different switch types like single-pole and dimmer switches. This guide helps you pick the best lighting control for your home.
Whether you’re upgrading your home’s electrical system or just replacing a switch, you now have the knowledge. This will help you feel confident when working on lighting projects.
Always remember to be safe when doing electrical work. Follow safety rules and get the right permits. This way, your project will be done right and your home will stay safe.
So, don’t worry about replacing your old light switches. With this guide, you’re ready to take on your next lighting project. Happy DIYing!