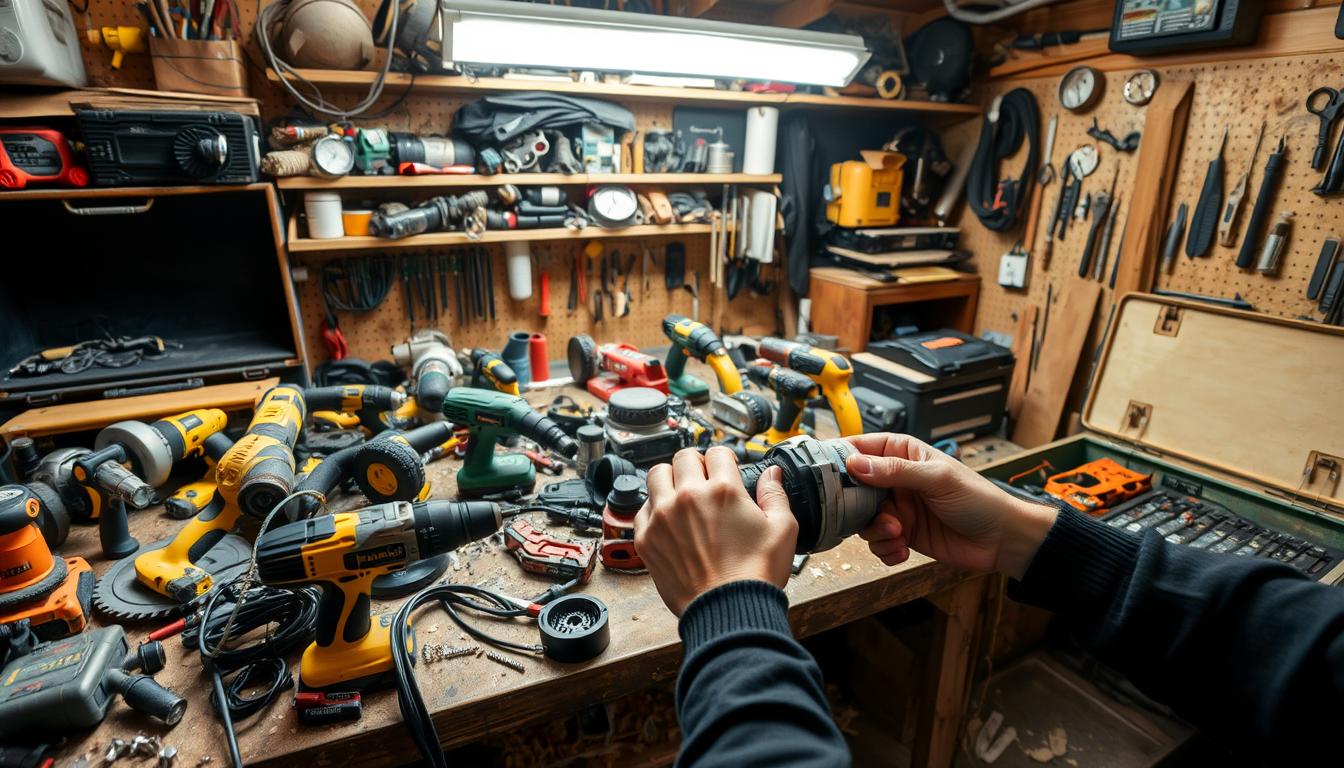
Being able to fix your own power tools is key for any DIY fan. It saves money and keeps your tools in top shape. With some practice, you can learn to solve problems with your tools. This makes them last longer and work better.
Knowing how to repair tools makes you more independent. It boosts your confidence in handling projects. A good guide can show you how to start.
Fixing your tools yourself means no need for expensive shops. With the right tools and a bit of knowledge, you can do many repairs. It’s a skill that helps you save time and money, whether you’re new or experienced.
Start with easy fixes and move to harder ones. Use a guide to help you. This way, you’ll get better at fixing your tools.
Key Takeaways
- Learning to perform DIY tool repair can save you money and extend the life of your power tools
- Tool troubleshooting is an essential skill for identifying and fixing issues with your power tools
- A good repair guide can provide you with the necessary information to get started with DIY tool repair
- Simple repairs can be performed with basic tools and knowledge
- Practicing DIY tool repair can help you become more self-sufficient and confident in your ability to tackle various projects
- Regular maintenance and repair can improve the performance and lifespan of your power tools
- DIY tool repair can help you avoid the hassle and expense of taking your tools to a professional repair shop
Essential Safety Precautions Before Starting Any Tool Repair
When you’re working on tool maintenance and repair, safety comes first. Before starting, make sure to take the right safety precautions. This means wearing gloves and safety glasses and working in a safe, well-ventilated area.
A clean and safe workspace is key for avoiding accidents and doing a good job. Make sure the area is tidy, and have a fire extinguisher and first aid kit ready. Always remember to unplug tools and equipment before you start to stay safe from electrical shock.
Required Safety Equipment and Gear
- Gloves and safety glasses
- Steel-toed boots and a dust mask
- A fire extinguisher and first aid kit
Understanding Electrical Safety
Electrical safety is very important in tool repair. Always unplug tools and equipment before you start. Also, be careful of any electrical hazards in your workspace.
Basic Tools and Equipment Needed for DIY Tool Repair
For DIY tool repair, having the right basic tools and equipment needed is crucial. A well-stocked toolbox with essentials like screwdrivers, pliers, and wrenches is key. These tools help you tackle most repairs confidently. It’s important to choose the right tools for the job, considering the type of tool and repair complexity.
Start by investing in high-quality, versatile tools for various tasks. Some must-haves include:
- Screwdrivers (flathead and Phillips)
- Pliers (needle-nose and slip-joint)
- Wrenches (adjustable and fixed)
- Wire cutters and strippers
Also, having the right equipment needed for specific repairs is beneficial. This might include a workbench, vise, or specialized tools like a drill press or sanding machine. With the right tools and equipment, you can handle a range of DIY tool repairs, from simple fixes to complex projects.
Remember, the key to successful DIY tool repair is having the right tools and equipment. With practice and patience, you’ll master even the toughest repairs.
| Tool | Description |
|---|---|
| Screwdriver | Used for driving screws and other fasteners |
| Pliers | Used for gripping and bending objects |
| Wrench | Used for tightening and loosening bolts and nuts |
Understanding Power Tool Components and Functions
To fix power tools, knowing their parts and how they work is key. Tools like drills and saws have motors, batteries, and gears. These parts help the tools do their jobs. Learning about these parts helps you find and fix common problems.
Tools also have switches, cords, and chucks. Each part is important for the tool’s function. For example, a bad switch stops the tool from working, and a broken cord can shock you. Knowing how to fix or replace these parts is crucial for keeping your tools in good shape.
Identifying Problem Areas
When fixing power tool issues, finding the problem is the first step. Look at the tool’s parts for signs of wear or damage. Common issues include worn brushes, bad bearings, and clogged filters. Spotting these problems lets you fix or replace the parts, keeping your tools working well.
Knowing about power tool parts and functions helps you fix problems faster. This saves time and makes your tools last longer. Whether you’re a DIY fan or a pro contractor, understanding these basics is key to doing the job right.
Diagnosing Common Power Tool Problems
Fixing power tool repair starts with finding the problem. Issues can be anything from broken motors to worn parts. Knowing what’s wrong is key.
Start by looking at the tool’s symptoms and its history. This helps you understand what might be wrong. A detailed check can show problems like loose wires or clogged filters.
Looking at the tool’s manual can also help. It often lists common issues and how to fix them. Some common problems include:
- Overheating or unusual noises
- Reduced performance or power output
- Physical damage or wear and tear
By systematically checking the tool, you can find the cause. This might mean replacing parts, cleaning, or adjusting settings. With the right steps, you can fix your tools and make them work better.
Many common problems have simple fixes. A good diagnosis is the first step to fixing your tools. By understanding the issue and following a plan, you can save time and money.
Quick Fixes for Cordless Drill Issues
When your cordless drill stops working, it can be really frustrating. But, many problems can be fixed quickly. Issues like battery problems, chuck repair, and motor troubles are common. Knowing how to fix these can save you time and money.
Battery Problems and Solutions
Battery issues are common in cordless drills. Try charging the battery for longer or replace it if needed. Also, clean the battery contacts for a better connection.
Chuck Repair and Maintenance
The chuck is key to your cordless drill. Clean it often and use lubricant on moving parts. If it’s damaged, you might need a new one.
Here are some tips for keeping your cordless drill in good shape:
- Regularly clean the drill and its parts
- Apply lubricant to moving parts
- Store the drill in a dry place
Motor Troubleshooting
If the motor isn’t working, check the power source and make sure the drill is put together right. Try resetting the drill or replacing the motor if needed.
| Issue | Solution |
|---|---|
| Battery not charging | Check the power source and charging cable |
| Chuck not turning | Check the chuck’s condition and apply lubricant if necessary |
| Motor not working | Check the power source and ensure proper assembly |
Professional DIY Tool Repair Techniques for Sanders and Grinders
Sanders and grinders need special care because of their complex parts and fast speeds. To fix them right and safely, using professional methods is key. Knowing how to maintain these tools well can stop many problems.
Common issues include worn belts, broken motors, and blocked air vents. To fix these, DIY fans can take a few easy steps:
- Check and swap out old parts like belts and brushes to avoid more damage.
- Clean tools and parts well to get rid of dust and dirt.
- Put lubricants on moving parts to cut down on friction and wear.
Using these expert tips, DIYers can make their sanders and grinders last longer. This means they won’t need to fix or replace them as often. Also, keeping tools in good shape helps avoid accidents and makes work safer. For example, regular cleaning stops dust and dirt from causing tools to overheat or break down.
Also, fixing tools yourself can save money, which is great for those who use sanders and grinders a lot. By learning and using these expert methods, anyone can get good at fixing their tools. This way, they can keep their sanders and grinders in top shape, just like the pros do.
Fixing Electric Saw Problems and Maintenance
Keeping your electric saw in top shape is crucial. One big problem is blade alignment issues. These can cause uneven cuts and affect accuracy. Make sure to check and adjust the blade alignment often to keep it aligned with the saw’s miter gauge.
Another important part of care is fixing motor problems. If your saw’s motor isn’t working right, find out why. Check the power cord, make sure the motor is lubricated, and look at the saw’s brushes. Fixing motor issues quickly can help your saw last longer.
- Regularly clean the saw’s blade and miter gauge to prevent debris buildup
- Check the saw’s motor and bearings for signs of wear or damage
- Ensure the saw’s power cord is in good condition and properly stored
By following these tips, you can avoid common issues like blade alignment and motor problems. This will keep your saw in great condition. Always check your saw’s manual for specific care and fix instructions.
Troubleshooting Router and Planer Issues
Working with power tools like routers and planners can sometimes lead to problems. Troubleshooting these issues is key to moving forward with your projects. First, find out what’s causing the problem. It might be a bad motor or worn-out parts.
Start by checking the power source and making sure everything is plugged in right. Then, look for any damage or wear on the tool. For routers, check the bits and bearings. For planners, look at the blades and rollers.
Common issues include uneven cuts, vibration, or overheating. Here’s how to fix these problems:
- Replace any worn-out parts, like blades or bits, in your router or planer.
- Keep your tool in good shape with regular cleaning and oiling.
- Make sure the tool is set up right and calibrated correctly.
By following these steps, you can quickly find and fix problems with your router or planer. This way, you can get back to your projects with confidence.
Remember, regular maintenance and troubleshooting can extend the life of your power tools and prevent costly repairs down the line.
Power Tool Maintenance Schedule and Tips
Keeping your power tools in top shape is key to their longevity and performance. A good maintenance schedule helps you avoid expensive fixes. By sticking to a routine, you can prevent tool breakdowns and keep your projects on track.
It’s crucial to have a plan for maintaining your power tools. This includes daily cleaning and checks, as well as monthly and yearly inspections. Following a schedule helps prevent damage, reduces accident risks, and keeps your tools in prime condition.
Daily Maintenance Tasks
- Clean and inspect your tools after each use
- Check for damage or wear and tear
- Apply lubricant to moving parts
Monthly Check-ups
- Check and replace worn or damaged parts
- Inspect power cords and plugs for damage
- Test tools to ensure they are functioning properly
Annual Deep Cleaning
Deep cleaning your tools once a year is vital. This means taking them apart, cleaning each part, and putting them back together. By doing this, you can make your tools last longer and work better.
When to Attempt Repairs vs. Seeking Professional Help
Knowing when to fix things yourself and when to call a pro is key to keeping your tools in top shape. DIY fixes can save money and feel rewarding. But, it’s important to know your limits and get help when needed. When to seek professional help depends on the problem’s complexity and your skills.
Try DIY fixes for small issues like replacing parts or cleaning tools. But, for big problems like electrical issues or major breakdowns, it’s best to get professional help. Also, if you’re not sure what’s wrong or how to fix it, it’s safer to ask a pro to avoid making things worse.
Here are some things to think about when deciding to fix it yourself or get a pro:
- Complexity of the issue: If it’s a tough problem or needs special knowledge, get a pro.
- Level of expertise: If you’re new to the tool or repair, it’s safer to get a pro.
- Cost: If fixing it costs almost as much as a new tool, getting a pro might be cheaper.
By thinking about these points and being honest about your skills, you can decide wisely. It’s always safer to choose professional help if you’re not sure.
In short, knowing when to fix things yourself and when to get a pro is crucial for your tools. Think about the problem’s complexity, your skills, and the cost. This way, you can make a smart choice and keep your tools working well.
| Issue | DIY Repair | Professional Help |
|---|---|---|
| Minor issues (e.g., replacing worn-out parts) | Yes | No |
| Complex issues (e.g., electrical problems) | No | Yes |
| Uncertain cause or repair process | No | Yes |
Cost-Saving Benefits of DIY Power Tool Repairs
DIY repair can save money for power tool owners. By fixing tools themselves, they avoid high professional repair costs. It’s important to compare DIY and professional repair prices to choose the best option.
DIY repair offers long-term benefits. It teaches people to maintain their tools, extending their life. This saves money and boosts confidence in repair skills.
Price Comparison: DIY vs. Professional Repair
Comparing DIY and professional repair costs is key. Consider the cost of parts, labor, and extra materials. This helps decide if DIY or professional help is cheaper.
Long-term Maintenance Benefits
DIY repair also has long-term advantages. Regular maintenance and repairs extend tool life and reduce repair needs. This saves money and boosts productivity.
Some benefits include:
- Extended tool life
- Reduced maintenance costs
- Increased productivity
- Improved safety
Conclusion: Empowering Yourself Through DIY Tool Repair
Learning to fix your own power tools is empowering. It lets you understand how they work and solve problems. You’ll feel more confident and in control of your projects.
Fixing tools yourself saves money and makes them last longer. It’s a great feeling to do it yourself.
Starting small is key to becoming good at DIY tool repair. Follow guides and ask for help when you need it. With each repair, you’ll get better and know more.
Soon, you’ll be the expert others turn to for tool advice. It’s a rewarding journey.
So, take on the challenge and start your DIY tool repair journey. You’ll gain self-reliance and a well-working workshop. Happy repairing!