Installing electrical outlets can be easy with the right help. This article will guide you through the process, focusing on safety. It’s important to know the basics of electrical outlets, whether you’re replacing an old one or installing a new one. Following safety steps is key to avoid accidents and ensure a good installation.
Safety is the most important thing when working with electrical outlets. That’s why a detailed guide is crucial. By following the right steps and using the right tools, you can install outlets safely and successfully. Electrical outlets are vital for any home’s electrical system, and proper installation is essential for efficiency.
With the right knowledge and tools, you can install outlets like a pro. This guide will give you all the info you need, including safety tips and a detailed installation walkthrough. From learning about electrical outlets to testing your new installation, we’ve got everything covered. Installing outlets can be a rewarding DIY project, and with the right guidance, you can do it safely and successfully.
Introduction to Outlet Installation
Before starting, it’s important to know the basics of outlet installation and safety. This guide will give you the info you need to start, including tools and materials. Whether you’re experienced or new to DIY, this guide will help you through the installation process, from preparation to testing.
Key Takeaways
- Outlet installation requires attention to detail and adherence to safety protocols
- Understanding the basics of electrical outlets is crucial for a successful installation
- Proper outlet installation can ensure a safe and efficient electrical system
- A comprehensive guide to outlet installation can make all the difference in ensuring a successful DIY project
- Electrical outlets are an essential part of any home’s electrical system
- Outlet installation can be a cost-effective and rewarding DIY project
Essential Safety Precautions Before Starting
DIY outlet installation requires installation safety as the first rule. Before starting, it’s key to know the dangers and how to avoid them. This means handling electrical wires carefully, turning off power, and wearing protective gear.
Knowing electrical codes is also crucial for a safe job. Learn the local electrical rules to avoid risks or fines. Proper preparation and planning lead to a safe and successful DIY outlet installation.
Understanding Electrical Hazards
Electrical dangers are serious and can be deadly. Common risks include electrical shock, fires, and explosions. Always turn off power and wear gloves and safety glasses to stay safe.
Required Safety Equipment
You need the right safety gear for a safe work area. This includes a voltage tester, wire strippers, and a non-contact voltage detector. Always use these tools as directed by the manufacturer.
When to Call a Professional
DIY outlet installation can save money and be rewarding. But, sometimes it’s better to call a pro. If the job is complex or you’re unsure, a licensed electrician can ensure a safe and right job.
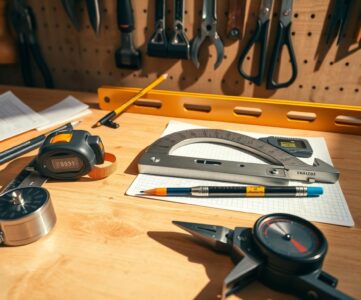
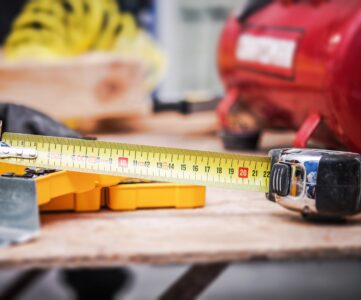
Tools and Materials Checklist
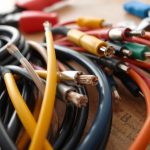
For a DIY outlet installation, the right tool requirements are key. You’ll need various tools and materials, like wire strippers, pliers, and the outlet itself.
Here’s a list of what you’ll need:
- Wire strippers
- Pliers
- Outlet
- Wires
- Electrical tape
Remember, the tool requirements can vary based on the outlet type. For instance, a GFCI outlet might need extra parts.
With the right tools and materials, your DIY outlet installation will be safe and successful. Always follow the manufacturer’s instructions and take safety precautions.
| Tool | Description |
|---|---|
| Wire strippers | Used to strip the insulation from wires |
| Pliers | Used to grip and bend wires |
| Outlet | The actual outlet being installed |
Understanding Your Home’s Electrical System
Before you install new electrical outlets, it’s important to know your home’s electrical system. This knowledge helps you work with your electrical panel safely and effectively. Your home’s electrical system has a network of wires that power outlets and appliances.
The circuit breaker panel is a key part of your home’s electrical system. It has circuit breakers that control electricity flow to different areas. Understanding how to read the wire color coding on these breakers is crucial for connecting wires to new outlets.
Circuit Breaker Basics
Circuit breakers trip when they sense an overload or short circuit. This protects your outlets and appliances from damage. It’s vital to match the outlet’s voltage to your electrical system for safe installation.
Wire Color Coding
Wire color coding helps identify different wires in your system. Common colors are black, red, and white. Black and red wires are for hot wires, while white is for neutral wires.
Voltage Requirements
Knowing your electrical outlets’ voltage is key for safe installation. Most homes run on 120/240 volts. Make sure new outlets match your home’s voltage for a safe and successful installation.
| Wire Color | Function |
|---|---|
| Black | Hot wire |
| Red | Hot wire |
| White | Neutral wire |
Proper Outlet Installation Planning
Planning is key for a successful outlet replacement. You need to pick the right spot for the outlet. Also, think about the type of outlet and if it should be smart home compatible.
Location is key when deciding where to install a new outlet. Think about where you use most of your electrical devices. This could be your living room or kitchen. It’s also important to choose the right type of outlet. You might need a standard outlet, a GFCI outlet, or a USB outlet.
- Standard outlets for general use
- GFCI outlets for areas near water, such as kitchens and bathrooms
- USB outlets for convenient device charging
Before starting, turn off the power at the main electrical panel. This keeps you safe while working with electrical systems. By planning well, you can have a successful outlet installation that improves your home.
Always follow local electrical codes and regulations for outlet replacement. If you’re unsure, get help from a licensed electrician. This ensures a safe and proper installation.
Step-by-Step Outlet Installation Guide
Installing a new outlet might seem hard, but it’s easy with the right help. It’s key to follow local electrical codes for safety and to meet regulations. GFCI outlets are very important in places like kitchens and bathrooms where water is around.
Before you start, turn off the power at the main electrical panel. This step is crucial to avoid electrical shocks or injuries. After the power is off, you can start the installation.
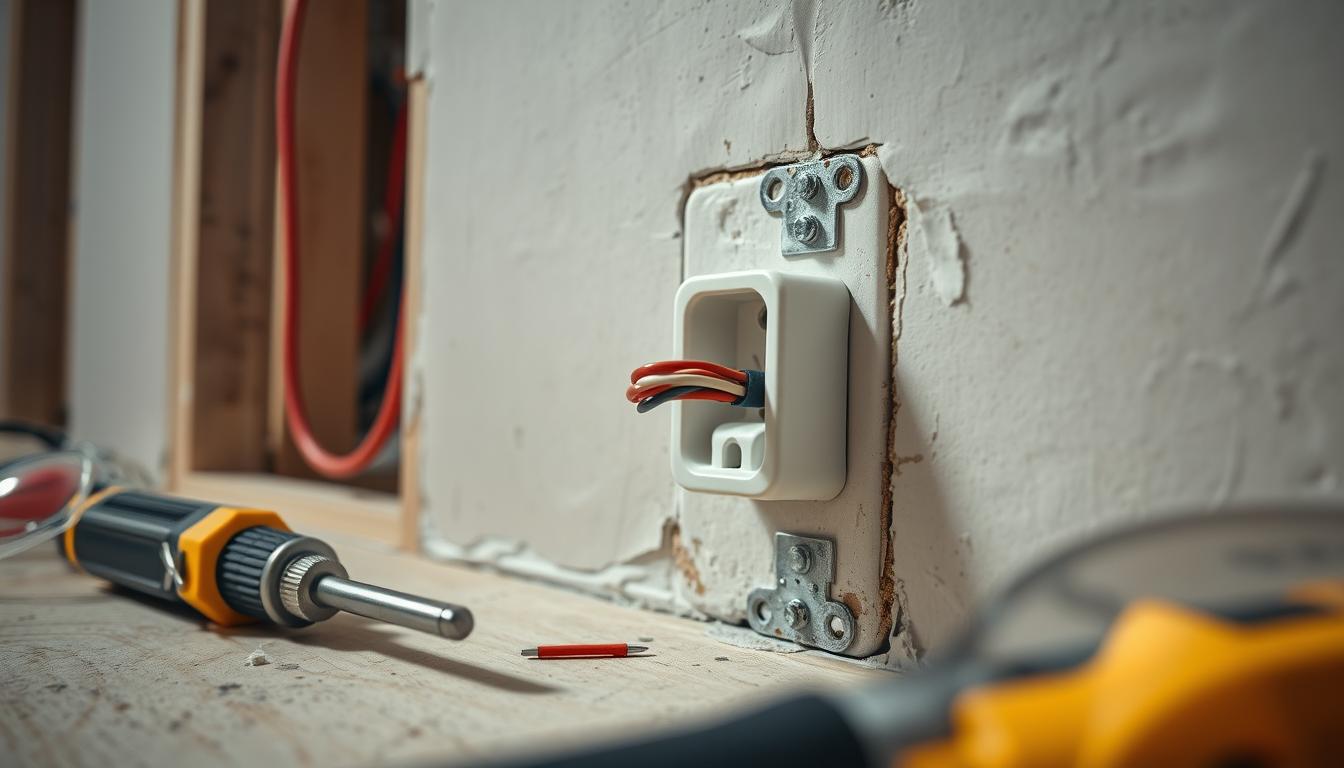
Removing the Old Outlet
First, take out the old outlet from the wall. This lets you see the wiring behind it. Be gentle to avoid damaging the wires or the area around them.
Preparing the Wiring
Next, get the wiring ready for the new outlet. You might need to strip the wires and connect them to the new outlet. Always follow the instructions from the outlet’s maker.
Connecting the New Outlet
With the wiring ready, connect the new outlet. Make sure it’s securely attached to the wall and all screws or clips are tight.
Testing the Installation
Lastly, test the installation to make sure it works. Plug in a device and turn on the power to check if the outlet is working right.
Always stick to local electrical codes and rules when installing outlets. GFCI outlets are vital for safety, helping prevent electrical shocks and injuries. By following these steps and being careful, you can have a safe and successful installation.
| Outlet Type | Location | Electrical Code Requirement |
|---|---|---|
| GFCI Outlet | Kitchen, Bathroom | Required by local electrical codes |
| Standard Outlet | Bedroom, Living Room | Not required, but recommended |
GFCI Outlet Installation Requirements
GFCI outlets are key for installation safety. They stop the electrical flow if there’s a ground fault. This makes them vital in kitchens and bathrooms.
To install GFCI outlets right, you need to know a few things. You must know where they’re needed, how to check them after putting them in, and the difference between GFCI and regular outlets.
- GFCI outlets are needed in places with water, like kitchens and bathrooms.
- They must be set up as the local electrical codes say.
- It’s important to test GFCI outlets often to make sure they work.
By sticking to the right installation safety steps and using GFCI outlets, homeowners can lower the risk of electrical shock. This makes their homes safer.
| Location | GFCI Outlet Requirement |
|---|---|
| Kitchens | Required near sinks and water sources |
| Bathrooms | Required near sinks and water sources |
| Outdoor areas | Required near pools and hot tubs |
Common Installation Mistakes to Avoid
When installing outlets, it’s key to avoid common mistakes for safety and success. One big error is making wire connections wrong, which can cause shocks or fires. Make sure all wire connections are tight and follow local electrical codes.
To steer clear of wiring mistakes, use a wiring diagram and stick to the manufacturer’s guide. Also, picking the wrong outlet box size can lead to issues. Always choose the correct size for your needs. Lastly, grounding problems are common, but can be fixed by ensuring all outlets are grounded right.
- Incorrect wire connections
- Using an improperly sized outlet box
- Grounding problems
Knowing these common mistakes and how to avoid them will help you install outlets safely. This way, you’ll meet all localelectrical codesand safety standards.
| Mistake | Consequence | Prevention |
|---|---|---|
| Incorrect wire connections | Electrical shocks or fires | Use a wiring diagram and follow manufacturer’s instructions |
| Improperly sized outlet box | Overheating or electrical issues | Choose the right size outlet box for the job |
| Grounding problems | Electrical shocks or equipment damage | Ensure all outlets are properly grounded |
Local Electrical Codes and Permits
When you’re doing DIY outlet installation, knowing local electrical codes is key. These codes change by area. It’s vital to learn the rules in your place to stay safe and avoid legal trouble.
The National Electrical Code (NEC) sets guidelines for electrical work, like installing outlets. It ensures electrical safety. Local areas might add their own rules to the NEC.
National Electrical Code Guidelines
The NEC covers many electrical installation details. This includes wire sizes, circuit breaker needs, and grounding. Following these rules helps your outlet installation meet safety standards.
Permit Requirements by Region
To see if you need a permit for your project, check with local authorities. Some places need permits for all electrical work. Others might only ask for them for bigger jobs. Getting the right permits is important to follow local laws and avoid fines.
Knowing and following local electrical codes and permits ensures a safe outlet installation. Always put safety first and follow local rules.
For more details on local electrical codes and permits, visit the National Electrical Code website. Or talk to a licensed electrician in your area.
| Region | Permit Requirements |
|---|---|
| National | NEC guidelines |
| Local | Vary by region |
Specialty Outlet Considerations
Some outlets need special care when replaced. This includes those with USB ports, smart outlets, or outlets for specific appliances. The tools needed for these outlets might be different from standard ones.
For instance, setting up a smart outlet might need a specialized tool. Outlets with USB ports might need a specific type of wire for safe and efficient charging.
Important things to think about when installing these outlets include:
- Make sure the outlet fits the appliance it’s meant for
- Use the right tools to avoid damage
- Follow the manufacturer’s guide for installation and setup
By carefully considering these points and using the correct tools, you can replace outlets safely and effectively.
Troubleshooting New Installations
After installing a new electrical outlet, it’s important to test it. This ensures it works right and is safe. You need to check for power, verify connections, and find any issues. These steps help make sure the outlets are safe and work well.
Having a good safety plan is key to avoid accidents. First, turn off the power at the circuit breaker or fuse box. Next, use a voltage tester to see if there’s power at the outlet. If there is, it might mean a bad connection or wrong wiring.
Testing for Power
Checking for power is a must to ensure outlets are installed right. Use a non-contact voltage tester to see if there’s power. This tool shows if there’s voltage, helping you stay safe from electrical shock.
Common Issues and Solutions
Some common problems with electrical outlets include overheating, bad connections, or wrong wiring. To fix these, always follow the manufacturer’s instructions and safety guidelines. Here are some common problems and how to solve them:
- No power at the outlet: Check the circuit breaker or fuse box to ensure the power is turned on.
- Overheating: Make sure the outlet isn’t too full and the wiring is right.
- Faulty connections: Look for any damage or wear on the connections.
By following these steps and making sure outlets are safe, you can have a good installation. Always follow the manufacturer’s instructions and be careful to avoid electrical shock or accidents.
| Issue | Solution |
|---|---|
| No power at the outlet | Check the circuit breaker or fuse box |
| Overheating | Verify that the outlet is not overloaded and that the wiring is correct |
| Faulty connections | Check the connections for any signs of damage or wear and tear |
Maintenance Tips for Installed Outlets
To keep your outlets safe and working well, regular care is key. This means cleaning them to stop dust from causing problems. Also, check the outlets for any damage or signs of overheating.
When it’s time to replace outlets, make sure to follow local electrical codes. This ensures a safe and legal setup. Here are some important tips to remember:
- Look for any damage or wear on the outlet or around it
- Make sure the outlet is grounded to avoid electrical shock
- Always follow the manufacturer’s instructions for replacement and installation
Keeping up with local electrical codes is also crucial for safety. By following these guidelines and staying informed, you can avoid electrical problems. This helps keep your outlets safe and working right.
Regular upkeep and outlet replacement can prevent fires and other dangers. Remember, electrical codes differ by area. So, always check with local authorities for specific rules.
By following these maintenance tips and knowing your local electrical codes, you can keep your home safe. Always put safety first when dealing with electrical systems. If you’re unsure about outlet replacement or maintenance, don’t hesitate to get professional help.
| Maintenance Task | Frequency |
|---|---|
| Cleaning | Every 6 months |
| Inspection | Every 12 months |
| Outlet replacement | As needed |
Conclusion
DIY outlet installation needs careful attention and a focus on safety. By following a step-by-step guide and electrical best practices, you can feel confident in your project. Always put safety first, and seek a licensed electrician if unsure.
With the right tools and planning, you can install new outlets in your home. Be careful, follow local electrical codes, and ask for help if needed. Understanding your home’s electrical system and following each step carefully will help you succeed.
Starting your DIY outlet journey is exciting. Use your new skills to improve your home’s electrical setup. Enjoy the process, and always remember to keep safety as your top priority!